Secure Autonomous Systems
Instructor: Prof. Sibin Mohan, The George Washington University
CSCI 6907/3907 | Fall 2022 | TR 12:45PM - 02:00PM PT | SMTH 115
MP II: PX4 Autopilot & Flight Controller Security
Administrivia
| Announcement Date |
Oct 10, 2022 |
| Submission Date |
Oct 21, 2022 |
| Submission Time |
11:59PM EDT |
| Total Points |
20 |
Objective
There are multiple flight firmwares with different architecture/design principles but understanding one of them helps with understanding others.
In this MP, we look into PX4 autopilot, an open-source autopilot firmware.
The following objectives are designed to help you familiarize with flight controller firmware:
-
Install and use PX4 and PX4 Software-In-The-Loop simulatior to perform quadrotor flight simulation.
-
Gain familiarity with MAVLink and controlling the UAV using offboard control.
-
Understand internals of the PX4 and uORB middleware.
After we've familiarized ourselves with PX4, we will focus on Man-In-The-Middle attacks on PX4, we will implement a Man-In-The-Middle (MitM) attack on the PX4 firwmare.
Prelude
The usage of drones is gaining popularity: from agricultural usage to a more safety critical usage such as firefighting and search and rescue.
Therefore, MP2 will focus on a auto-pilot flight controller.
There are two popular opensource auto-pilot flight controller: PX4 and Ardupilot.
Despite the architectural difference between the two, they both rely on the usage of a middleware to exchange messages between their components.
In this MP, we will be using PX4 and its Software-In-The-Loop (SITL) flight controller simulation with Gazebo physics simulation.
-
PX4 is a popular opensource autopilot that controls multicopters, fixed-wing aircrafts, rovers and submarines.
 As shown in the diagram, PX4 is composed of modules and the modules communicate using the uORB middleware.
-
uORB middware is a publish-subscribe middleware where a module can publish certain message topics and other modules can subscribe to the topic to get the message.
-
PX4 provides Software-In-The-Loop(SITL) simulation platform where PX4 controls a simulated vehicle in the host machine.

-
By default, SITL provides simplistic physics simulation. However, it supports Gazebo for more complex simulation.
-
PX4 also provides Hardware-In-The-Loop where the environment is simulated in the host machine but the flight controller runs in the flgiht hardware.
Middleware, also called Data Distribution Service (DDS), is an integral part in autonomous vehicles.
The middleware we have explored is uORB which is used by PX4 autopilot.
There also exists Ardupilot, another autopilot software, which uses Robotic Operating System (ROS) as middleware.
uORB is similar to the original ROS since they follow the publish/subscribe paradigm.
Because application of these middleswares are safety-critical in nature, there are some security concerns since both were not initially designed with security in mind.
ROS2, a newer standard of ROS with major changes, which was released (late 2010s) follows a DDS security specification
The specification allows authentication, authorization, and encryption.
Therefore, in this MP, we will investigate why such security measures are necessary by performing MitM by hijacking a uORB topic.
We assume the adversary (you) can deploy its malicious module into PX4 and can slightly change particular module of the firmware(specifically the EKF module).
Setting up PX4
We prepared a VM image which has the PX4 setup.
The setup has the following system requirement:
- 13GB Storage
- At least 4GB memory
- VirtualBox/VMWare (Note: Virtual Machines do not work very well with Apple M1/2 Macs, therefore it's advised to use an Intel Based Machine.)
To setup, download the VM image from here.
The username and password for the VM image is student
Running the PX4-SITL
Running the simulator
- Download the VM image here.
-
Inside the VM, change the directory to the PX4:
cd /home/student/Desktop/MP2/PX4-Autopilot/
-
To compile and start the simulation run:
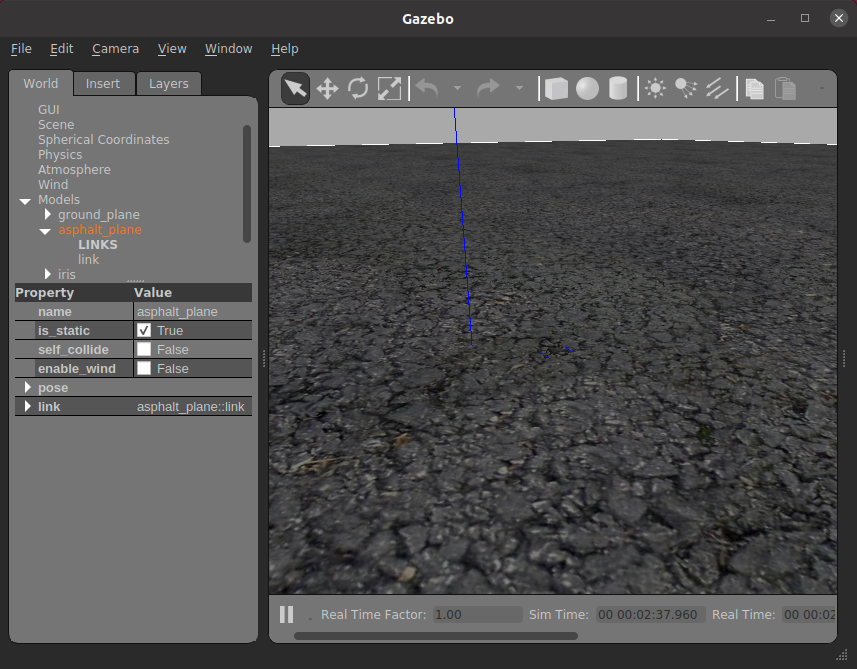
make px4_sitl gazebo
-
In PX4 command prompt, start the mp2 module
mp2 start

-
In another terminal, change the directory to MP2 base directory:
cd /home/student/Desktop/MP2/PX4-Autopilot/
-
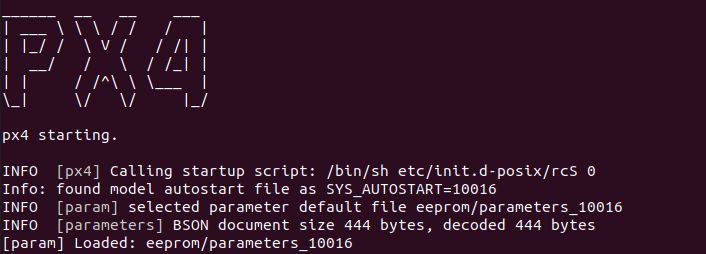
If the run is successful, you should see the following:
-
In another terminal, change the directory to the MP2 base directory and run the offboard control:
python3 mp2_offboard_control.py

MP II Instructions
Mavlink and Offboard Control
- Mavlink is the messaging protocol used by UAVs and rovers which contains information regarding the sensor data, state of the vehicle, and status of the vehicle.
- The protocol also contains commands to control the vehicle.
- Offboard control is a method of controlling the UAV like a script.
- For instance, the offboard control script can command the vehicle to move up by a meter or maintain certain velocity or attitude.
- In this MP, we will be using MAVSDK-Python and the script is located in
~/Desktop/MP2/mp2_offboard_control.py
- Check out the example script to implement the missions.
- Also checkout the API documentation.
-
Implement linear mission
- Place the setpoint to 10 meters above the ground for takeoff.
- Laterally move the vehicle by placing a position setpoint anywhere in the same altitude.
- Land where the vehicle was moved to.
-
Implement circular mission
- Place the setpoint to 10 meters above the ground for takeoff.
- Move the vehicle by placing multiple setpoints (at least 16) around the place of takeoff in a circular shape with radius equal to 20 meters
- The circular mission does not need to be a perfect circle.
-
-
When the script ends, the script outputs
traj.npy in numpy format.
-
To read the data, use
numpy.load().
-
The data is a matrix in following shape
(# of logs, 6) where columns consists of (north_pos, east_pos, down_pos, north_vel, east_vel, down_vel).
-
Because the coordinates are in North, East, Down (NED) format, when the drone takes off, the down_pos value should be negative and decrease.
-
We provided a script which can run with the following command
python3 mp2_plot_traj.py.
-
The script creates a window with a 3D plot which can be rotated using mouse can the plot can be saved using the save icon.
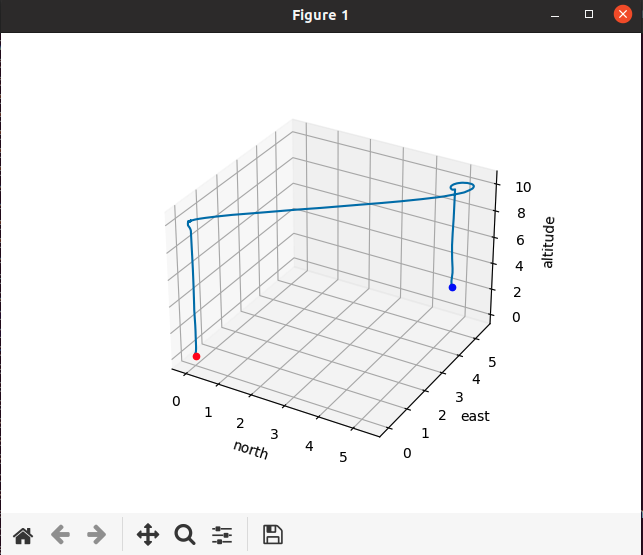
-
The red and blue points represent the starting point of the log and the end points of the log respectively (i.e., the vehicle moved from red point to the blue point following the line).
-
The blue point does not need to reach the ground since it only implies that the logging ended before the vehicle fully landed.
-
However, Make sure that the vehicle reaches the position before sending out the next command.
-
To read the latest position, use
async with lock: and read from the variable velpos.
uORB: Understanding the middleware
- We provided our skeleton module located in
PX4-Autopilot/src/modules/mp2.
However, it needs to subscribe to the vehicle_local_position.
You must uncomment /* and */.
- To subscribe to the topic, use
orb_subscribe(ORB_ID(INSERT_TOPIC_NAME_HERE)) to get the subscription id.
- Poll for the topic using
px4_poll().
- If the polling recieves the topic of interest, the data can be read by first creating the struct to hold the data:
struct INSERT_TOPIC_NAME_s topic_msg.
For example, to create a struct variable to hold the sensor_gyro message, use struct sensor_gyro_s var_name.
- Copy the data to the struct using
orb_copy(topic id, subscription id, reference to struct)(e.g., for sensor_gyro, it would be orb_copy(ORB_ID(sensor_gyro), gyro_sub_id, &var_name);.
- Check out this link for a more indepth tutorial.
Therefore for this task, subscribe to that topic and have the position information print out using
PX4_INFO() which takes input like printf().
Man-In-The-Middle
For this section:
-
We will hijack a topic by creating a custom uORB topic and causing the EKF module to publish to the malicious topic than the true topic.
-
EKF module will be publishing under a malicious uORB topic.
-
MP2 module will subscribe to the malicious topic and publish under the true topic with spoofed values.
-
We will look into four types of spoofing: constant offset, random offset, rotated, and scaled.
-
Adjustments in Running the PX4-SITL
For this section, there is an extra step where you have to run a server script.
There are additional files which you must download from here which contains the mp2_server.py and mp2_lib.
Later instructional steps will describe where to correctly extract the additional files.
Running the simulator
-
Start with the MP2 base directory:
cd /home/student/Desktop/MP2
-
Run the MP2 server:
python3 mp2_server.py which should wait for the mp2 module in the PX4 to run

-
In another terminal, change the directoy to
cd /home/student/Desktop/MP2/PX4-Autopilot
-
Compile and start the simulation by running:
make px4_sitl gazebo
-
In PX4 command prompt, start the mp2 module
mp2 start
-
In the third terminal, change the directory to the MP2 base directory and run the offboard control:
python3 mp2_offboard_control.py
-
Implementation Steps
-
Create a custom message that has the same structure as the
vehicle_local_position under a different name.
- Go to the
msg in PX4-Autopilot directory
- Copy the
vehicle_local_position.msg under a different name of your choosing.
- We will refer to it as
vehicle_local_position_copy
-
At the bottom of the
vehicle_local_position.msg, there should be two commented out lines

-
The commented out lines are responsible for it will be declared in
#inlcude.
-
Therefore, modify
vehicle_local_position_copy.msg to make it distict from the original.

-
Modify the
msg/CMakeLists.txt by adding vehicle_local_position_copy.msg to set(msg_files).
-
Hijack the
vehicle_local_position topic.
-
We want to modify the EKF module so that it publishes under the malicious topic.
-
In side
PX4-Autopilot/src/modules/ekf2/ we need to modify the EKF2Selector.cpp and EKF2Selector.hpp.
-
In side
EKF2Selector.hpp, first include the new message #include <uORB/topics/vehicle_local_position_copy.h>
-
Then find the line
uORB::Publication<vehicle_local_position_s> _vehicle_local_position_pub{ORB_ID(vehicle_local_position)}; which is responsible for publishing the topic.
-
Replace it with
uORB::Publication<vehicle_local_position_copy_s> _vehicle_local_position_pub{ORB_ID(vehicle_local_position_copy)}; to make the variable publish under different topic.
-
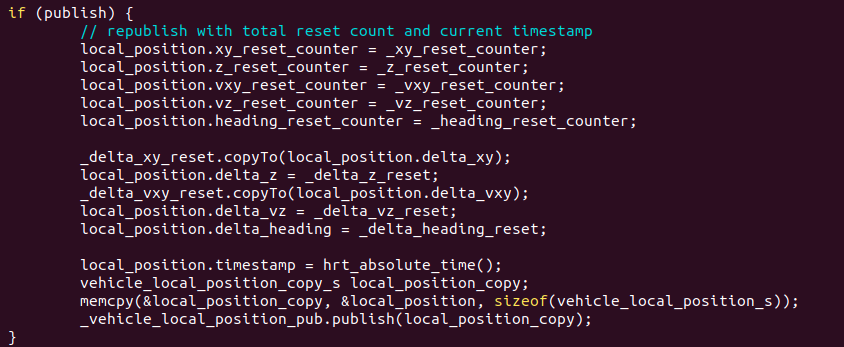
Go to the
EKF2Selector.cpp and find the function PublishVehicleLocalPosition().
-
In the very last few lines of code, find the line where
_vehicle_local_position_pub is used, create a struct of the new malicious and copy the vehicle_local_position struct to it using memcpy()
-
Should look like this:
-
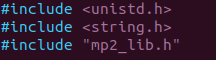
Make the mp2 module communicate with the
mp2_server.py.
-
Download the additional files here which contains
mp2_server.py and mp2_lib.cpp and mp2_lib.h
-
Extract the
mp2_server.py in the ~/Desktop/MP2/ directory.
-
Extract the
mp2_lib.cpp and mp2_lib.h in the ~/Desktop/MP2/PX4-Autopilot/src/modules/mp2 directory.
-
Modify the
mp2.hpp inside the modules/mp2
-
Include the
mp2_lib.h in mp2.hpp
-
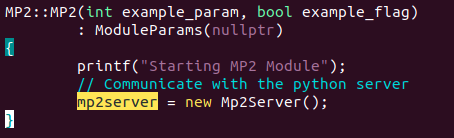
Add the following line
Mp2Server * mp2server; to the private section of the MP2 class.
-
Add
mp2_lib.cpp and mp2_lib.h in CMakeLists.txt under SRC
-
Modify the
mp2.cpp inside the modules/mp2 to read the new topic.
-
Initizlize the
mp2server in the MP2contructor
-
Subscribe to
vehicle_local_position_copy instead of vehicle_local_position (refer to MP2 part A, remember to change the struct type as well).
-
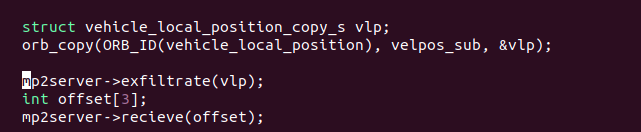
Inside the
run() function, use mp2server.exfiltrate() to send the subscribed data to the server and mp2server.recieve() to get the offset values back from the server.
-
Create
vehicle_local_position struct and memcpy() the subscribed data to the struct.
-
Add the values recieved from the server to the x, y, z position of the struct.
-
Create publishing id (similar to how there was subscribe id in part A) using
orb_advertise()
-
Publish the topic using
orb_publish()

-
Implement the attack types in the
mp2_server.py
-
Find the "TODO:" flags in the script and implement the corresponding attack.
-
Fixed offset attack adds fixed constant value (of your choosing) to each of the position values (specify the value you used in the report).
-
Random offset attack adds random value in a specified range (of your choosing) to each of the position values (specify the range of values you used in the report).
-
Flipped attack causes move in a trajectory where the X and Y positions are flipped.
-
Scaled attack causes move in a trajectory where the X and Y movements are scaled by a constant (i.e., if the mission is for the vehicle to move along x axis by 2 meters, in actualality it would move by 2*constant).
-
The
mp2_server.py outputs exfil_traj.npy which can be used by the prior plotting script by finding changing the "traj.npy" to "exfil_traj.npy".
Note: For each of the above missions, repeat them for the missions from the first section of this MP's Instructions, i.e. linear and circular.
Also, the "mission" is finite time and only should attack between the interval where drone takes off and stop when it lands.
Submission Instructions
- PX4
-
Plot of the trajectory of the two missions [3 points]
- Your
mp2_offboard_control and describe the implementation details in the report [4 points]
- Your
mp2.cpp module code [3 point]
- Man-in-the-Middle Implementation
-
Man-In-The-Middle implementation (fixed offset, random offset, flipped, and scaled) description [2 points]
-
Plot of the missions with MitM implementations: two missions (linear and circular) on the four attack types [8 points]