Secure Autonomous and Cyber-Physical Systems
Instructor: Prof. Sibin Mohan, Oregon State University
CS/ECE 599 | Winter 2022 Term | MW 2:00 - 3:50 PM PT | BAT 150
MP I-A: VEINS & F2MD Simulator Setup and Familiarity
Administrivia
| Announcement Date |
Jan. 05, 2022 |
| Submission Date |
Jan. 14, 2022 |
| Submission Time |
11:59 PM PT |
| Total Points |
5 |
Objective
In this MP, we give a brief tutorial-style introduction on how to get started with installing and using VEINS to perform vehicular network simulations.
We will cover the basic architectures of connected vehicle applications, network protocols, and security systems for vehicular networks. Objectives of this MP are as follows:
-
Install and use VEINS to perform vehicular network simulations.
-
Gain familiarity with connected vehicle applications, network protocols, and security applications for vehicular networks.
-
Gain a basic understanding of misbehavior and common attacks in distributed networks in the context of connected vehicles.
-
Understanding the implementation and tuning of attack strategies and security systems in networked systems.
Prelude
In this MP, we will be using the VEINS & F2MD simulator to simulate the behavior of vehicular networks.
-
VEINS, the Open Source vehicular network simulation framework, ships as a suite of simulation models for
vehicular networking. These models are executed by an event-based network simulator (OMNeT++) while
interacting with a road traffic simulator (SUMO). Other components of Veins take care of setting up,
running, and monitoring the simulation:

- The commuting vehicles in V2X network will communicate with each other using the designated V2X
communication protocol.
-
The simulator will be used to simulate the behavior of a vehicle in a cyber-physical system.
-
The vehicles will be moving in predefined routes, and will obey the rules of the traffic system.
-
We will be using F2MD plugin for VEINS simulator to simulate the behavior of a vehicle in a
cyber-physical system. This pluging comes with a good user interfaces that can be used for various tasks
related to V2X network systems design. The architecture for F2MD plugin is as follows:
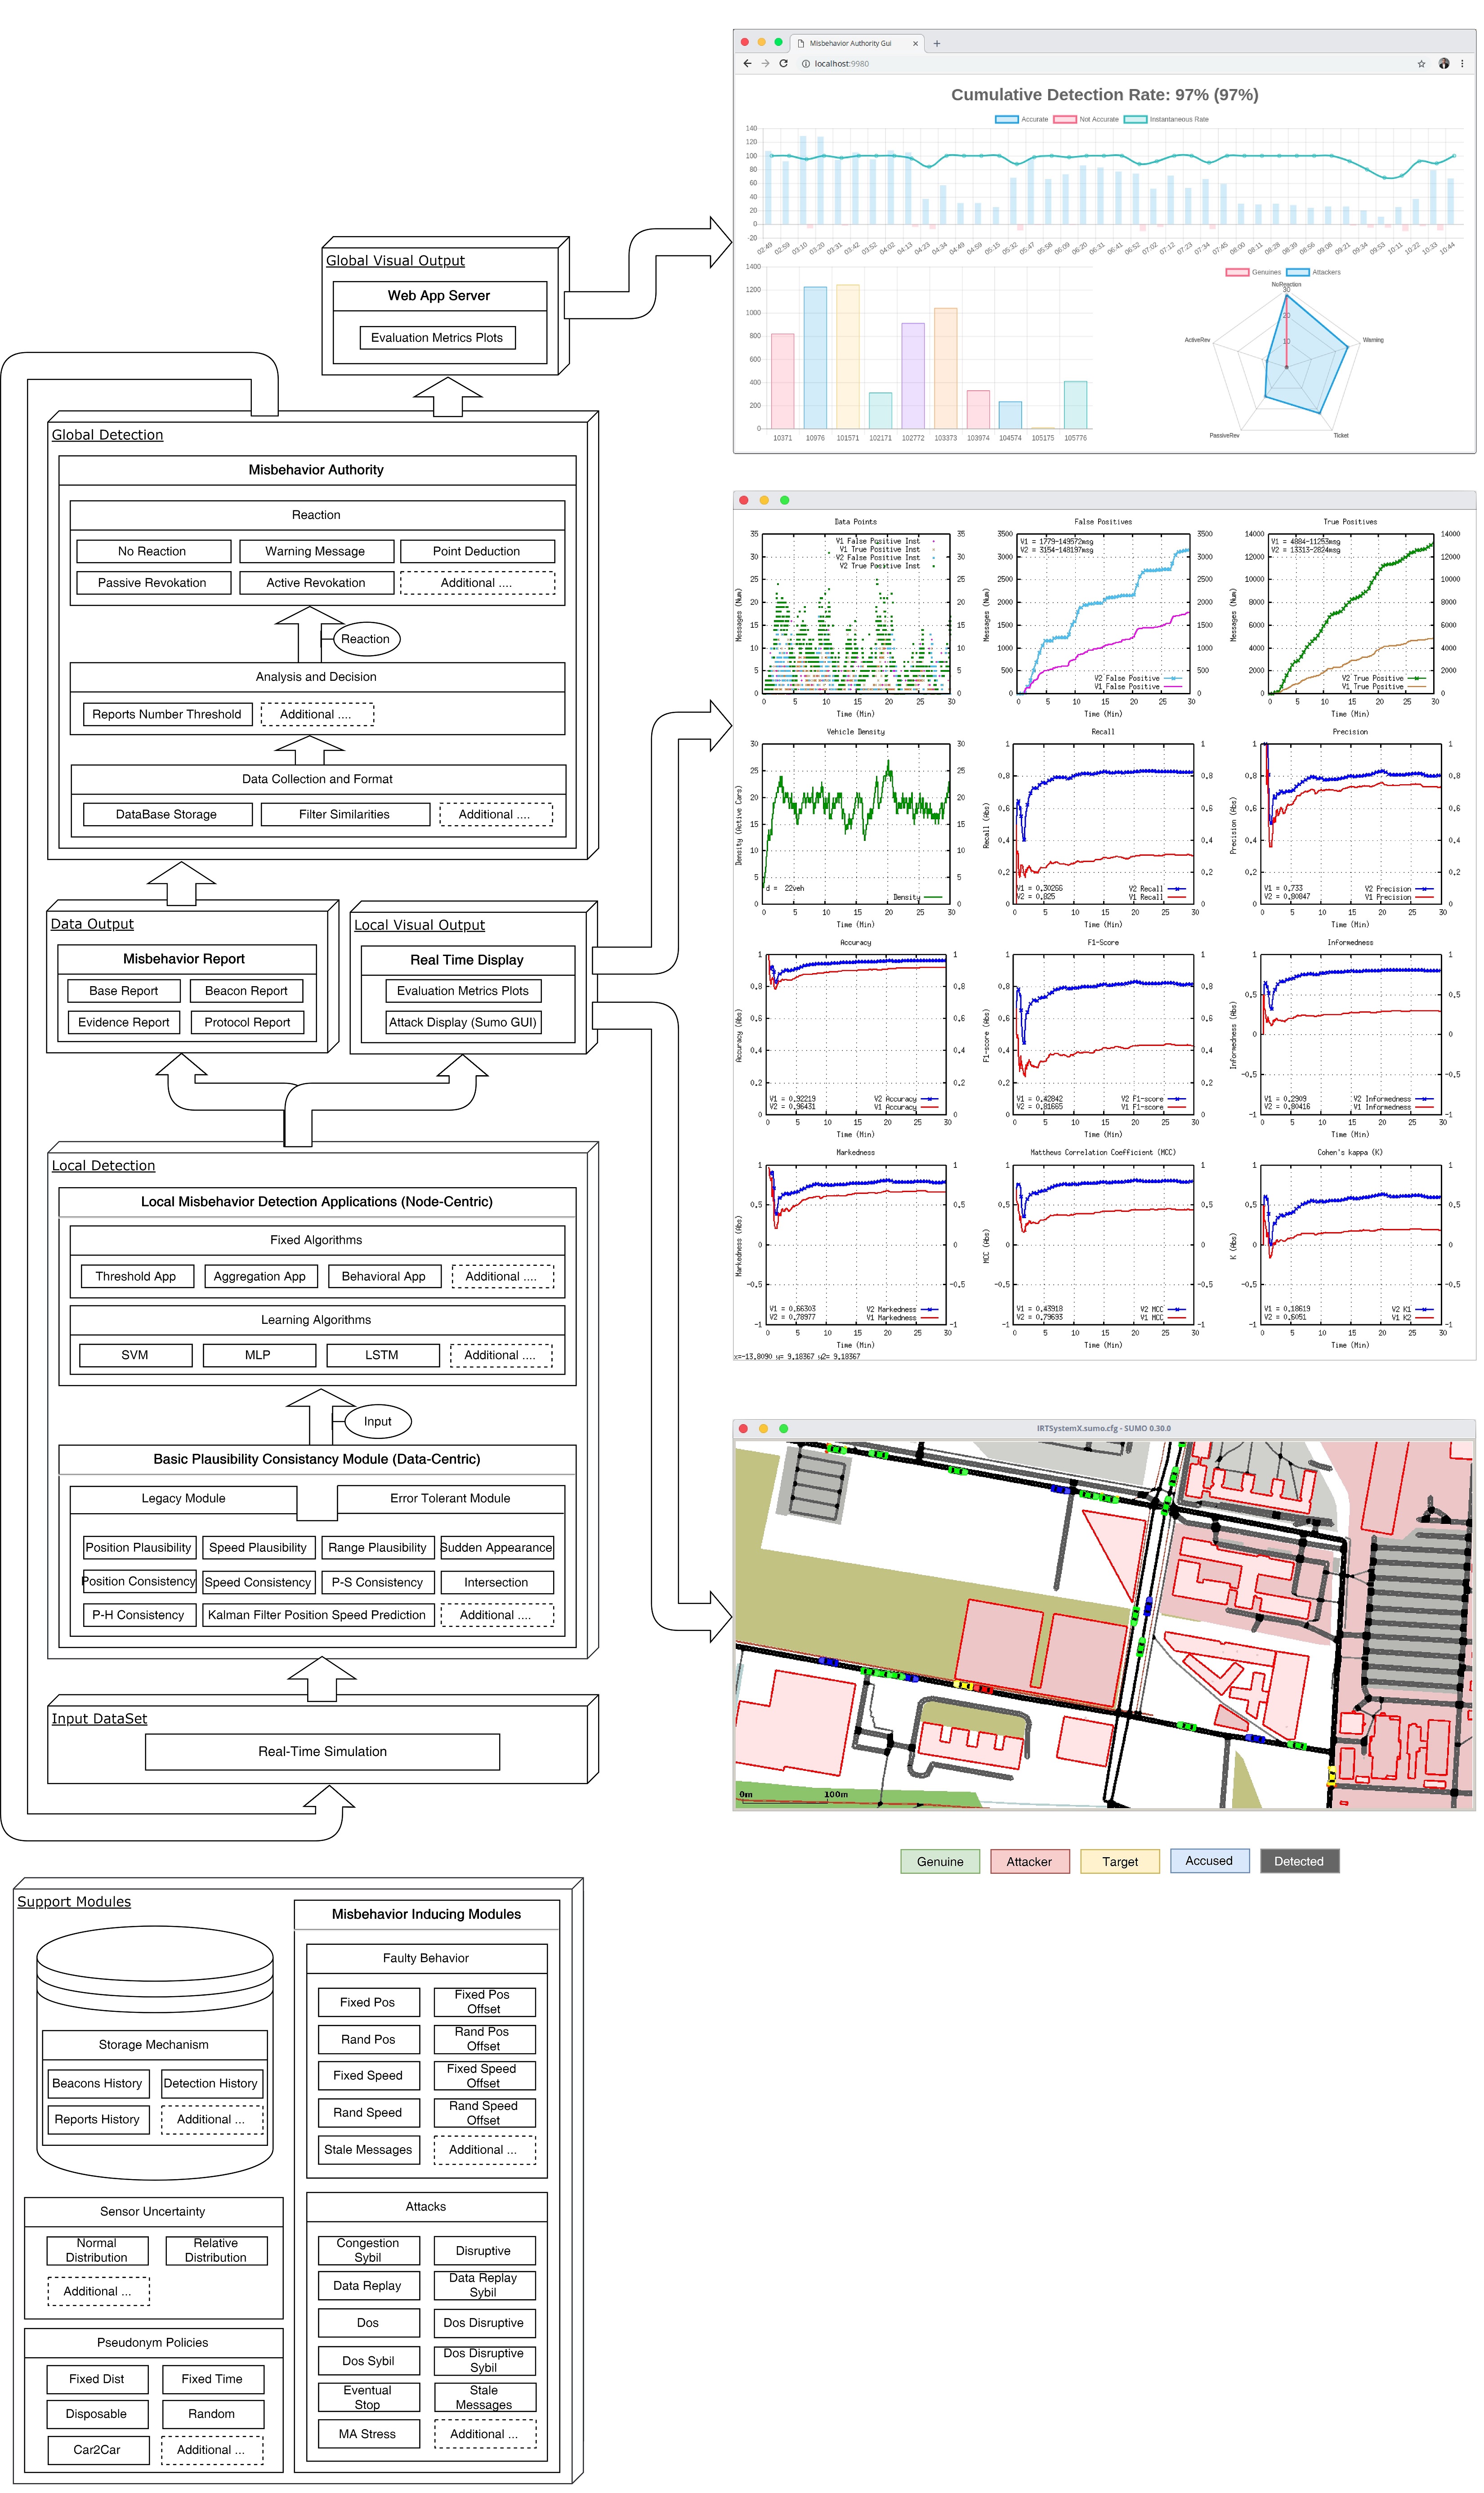
Installation of VEINS
We prepared a VM image for the VEINS simulator. It has everything readily installed for you to easily use and
run the simulator.
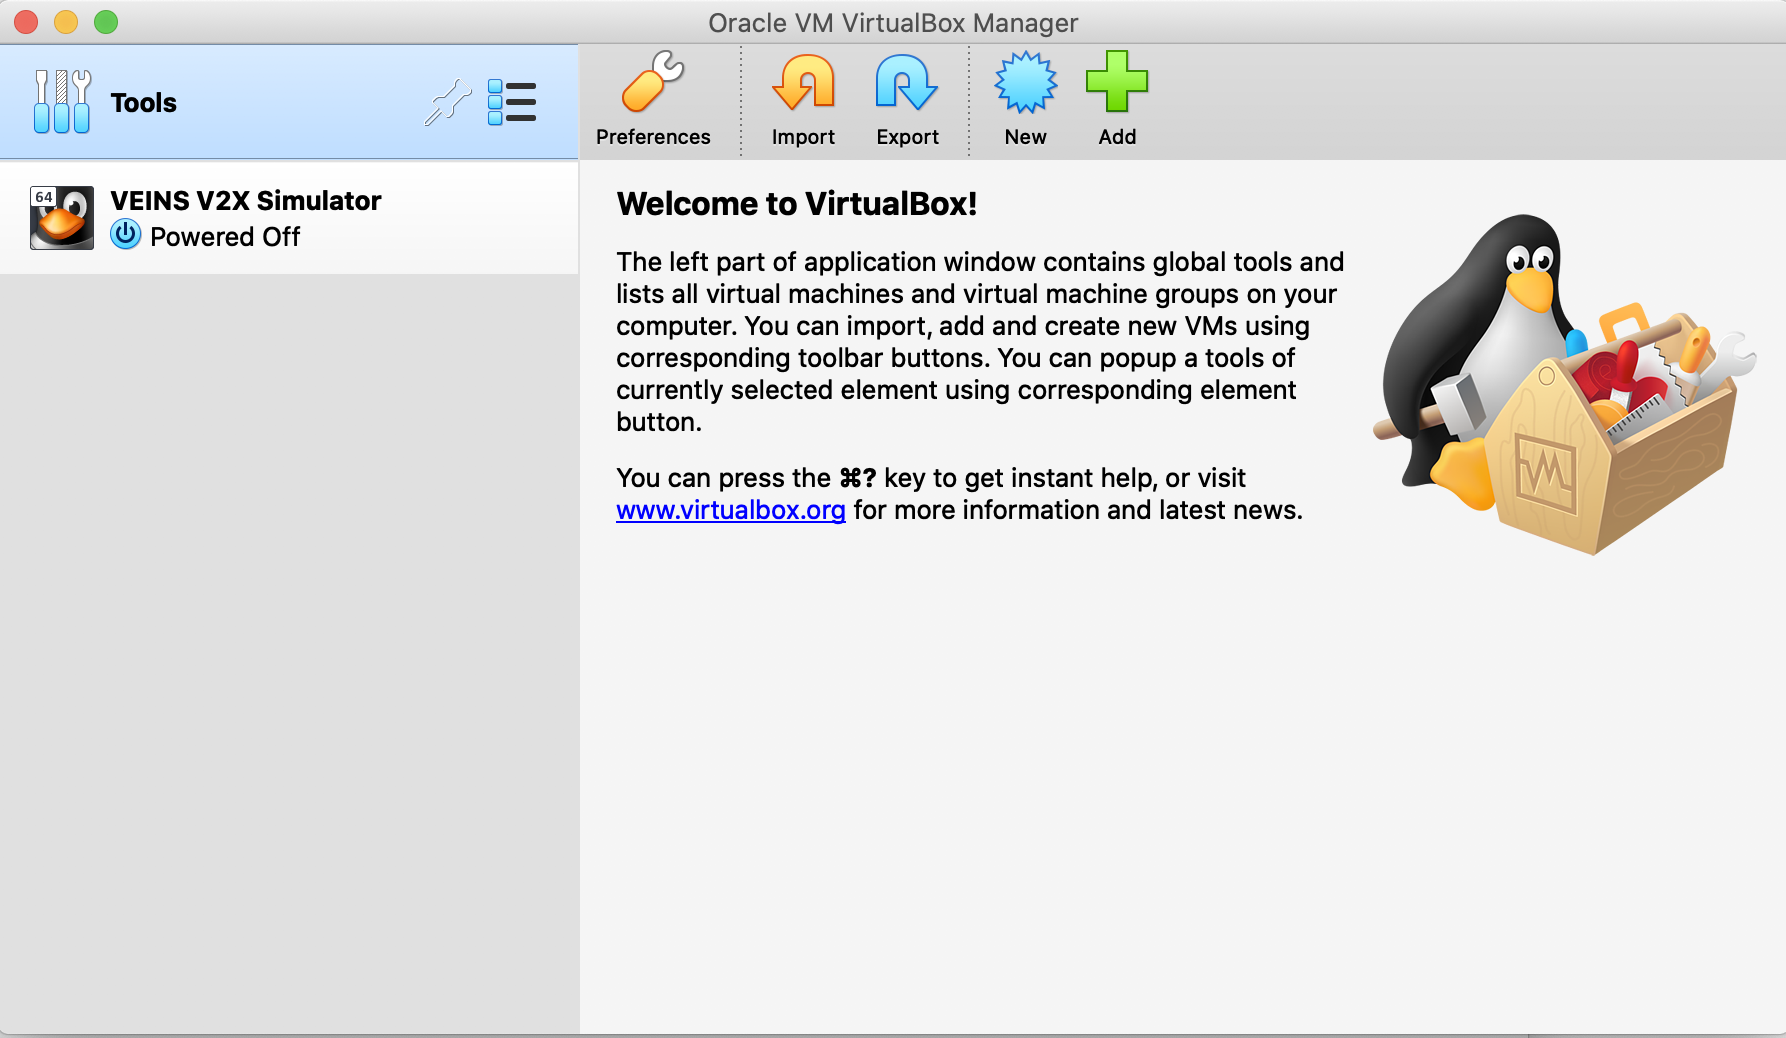
- Download and Install VirtualBox for your distribution from the following website: https://www.virtualbox.org/wiki/Downloads
-
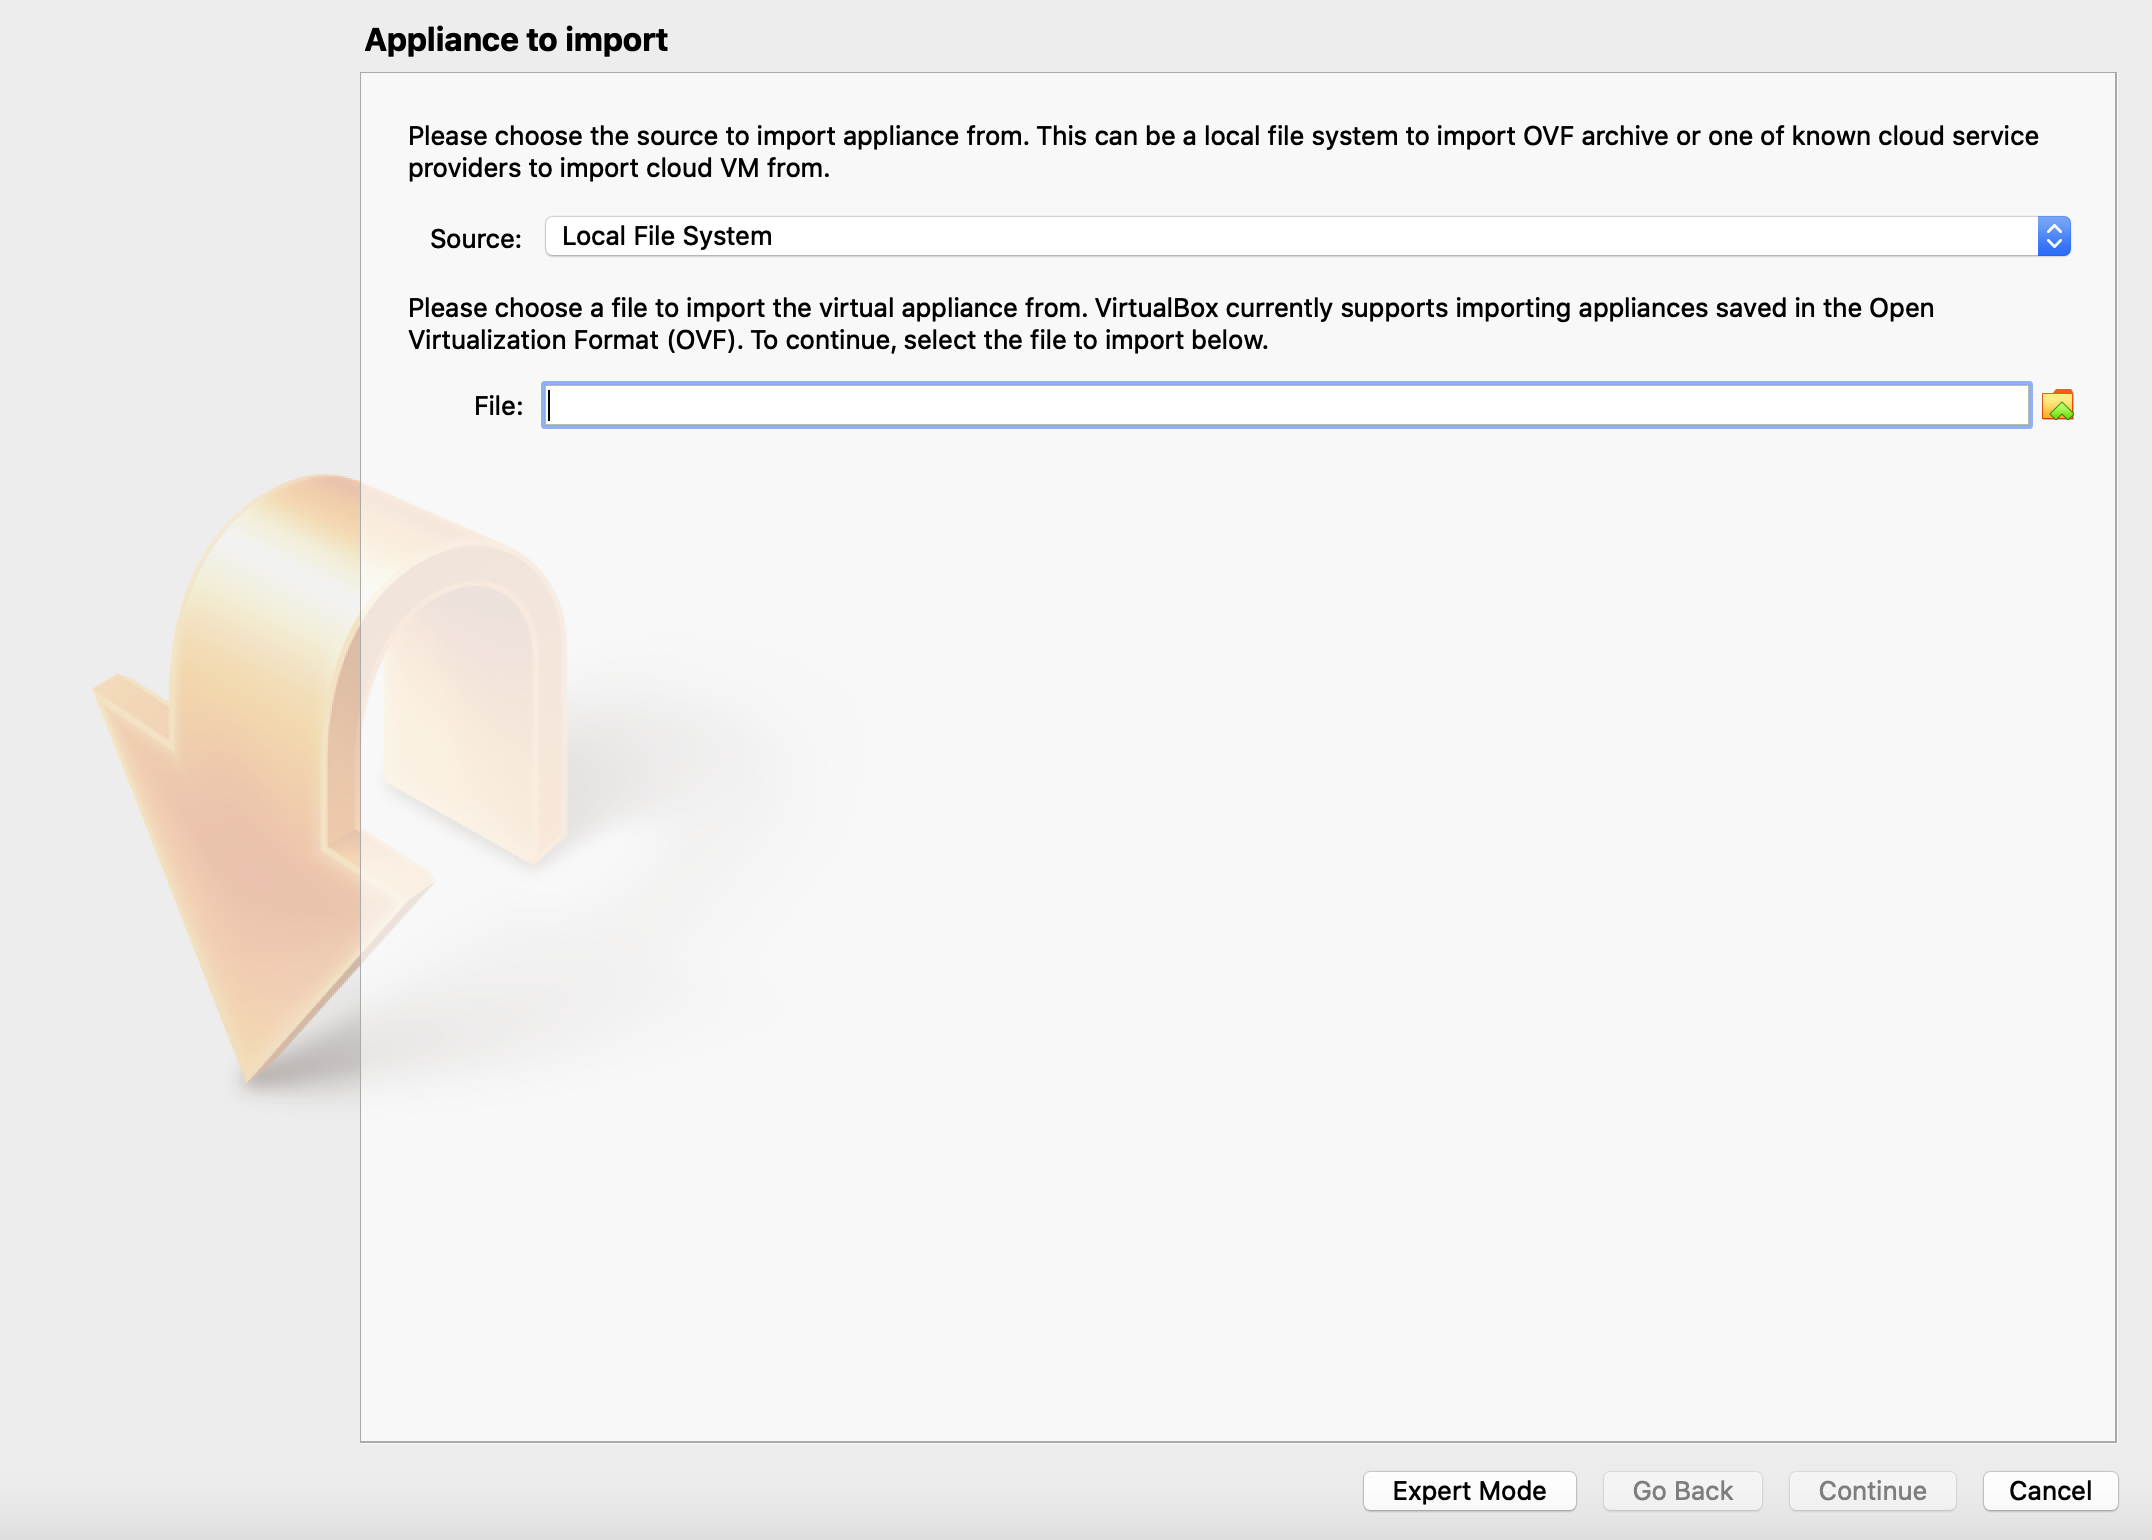
Import the VM image to VirtualBox and start the VM.
- Download VM image file
VEINS V2X Simulator.ova from: https://oregonstate.box.com/s/xybtjpuqo7f3a9rae7djoxixrpepzh41
- On the main screen of VirtualBox, choose Tools and Import:
- Browse and choose the
VEINS V2X Simulator.ova file, click continue and import.
- After importing, you should see the simulator machine in the main screen of VirtualBox:
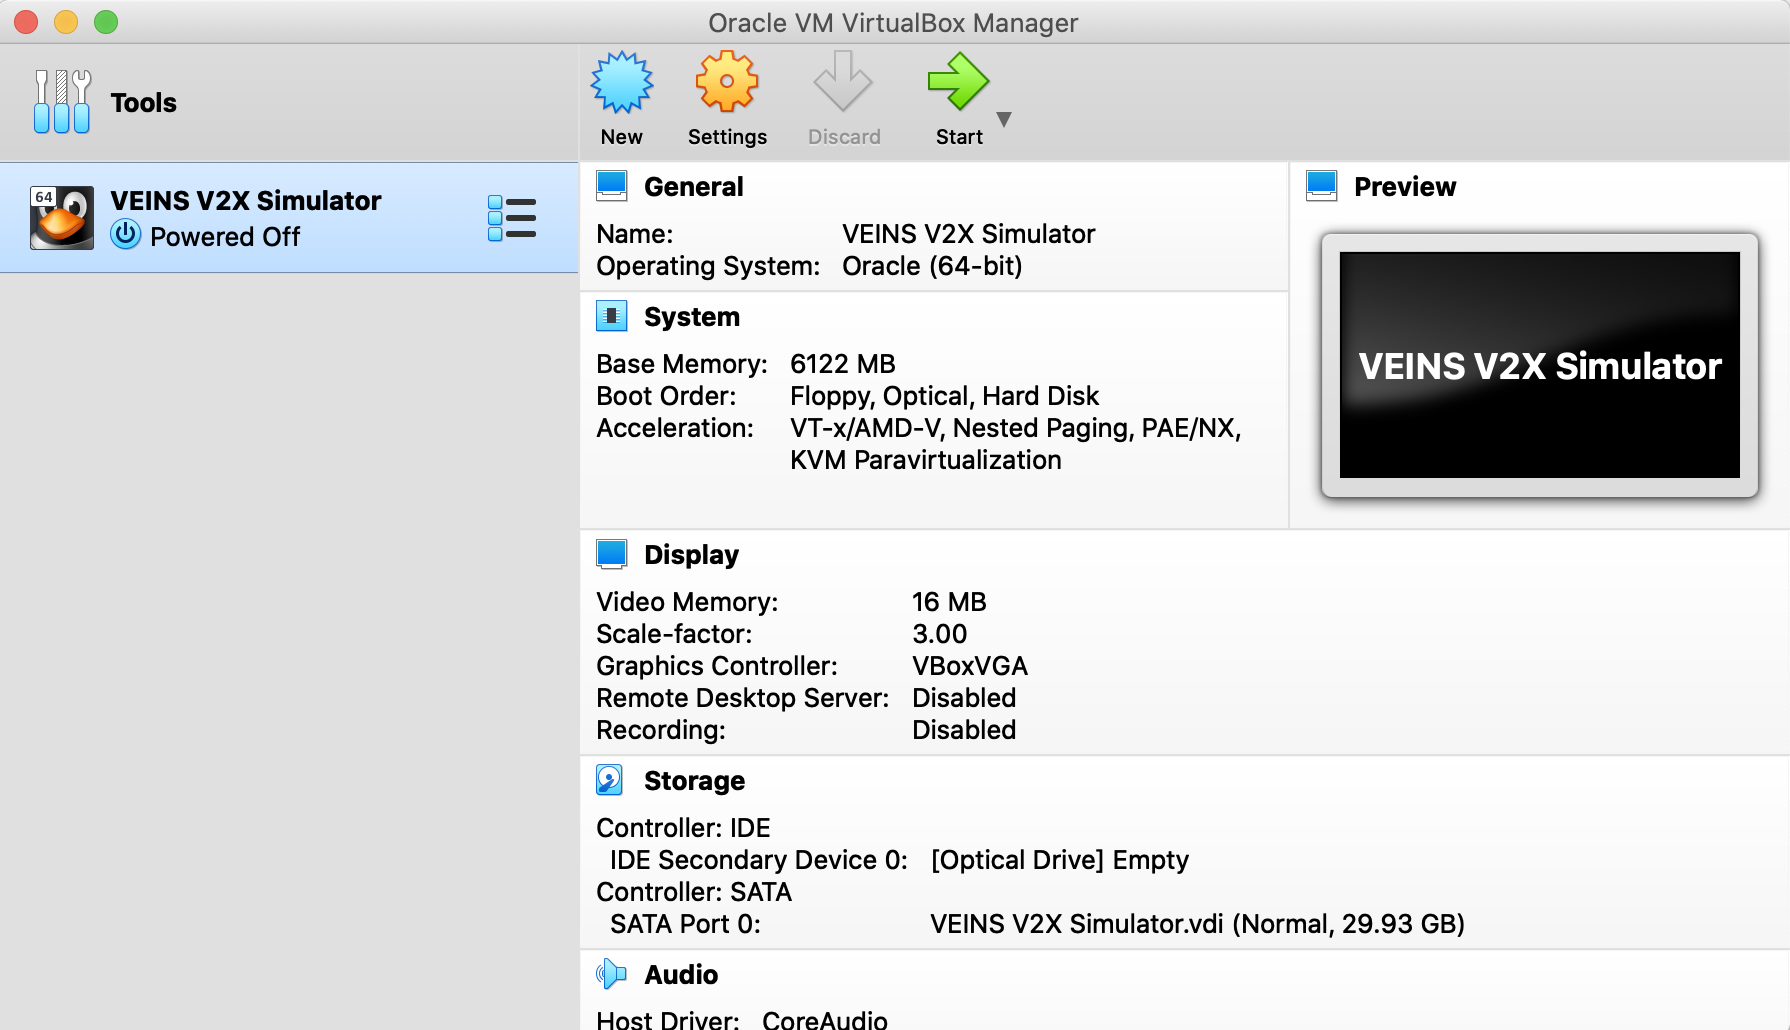 Click start to turn-on the machine. If asked for sudo password during login, enter the password
 123123.
-
After the VM is started, you can start and check the simulator by running the following commands:
- Go to
Desktop/v2x_simulator/F2MD/F2MD directory, right click to any empty space inside the folder and choose "Open in Terminal" to open up a terminal.
- Launch the SUMO TraCI daemon:
$ ./launchSumoTraciDaemon
Choose "With GUI" option. Do not close this terminal, as it is necessary for simulations.
(If you do not want to see graphical V2X simulations, choose "Without
GUI". Simulations will be faster with less memory consumption).

- Start another terminal and run:
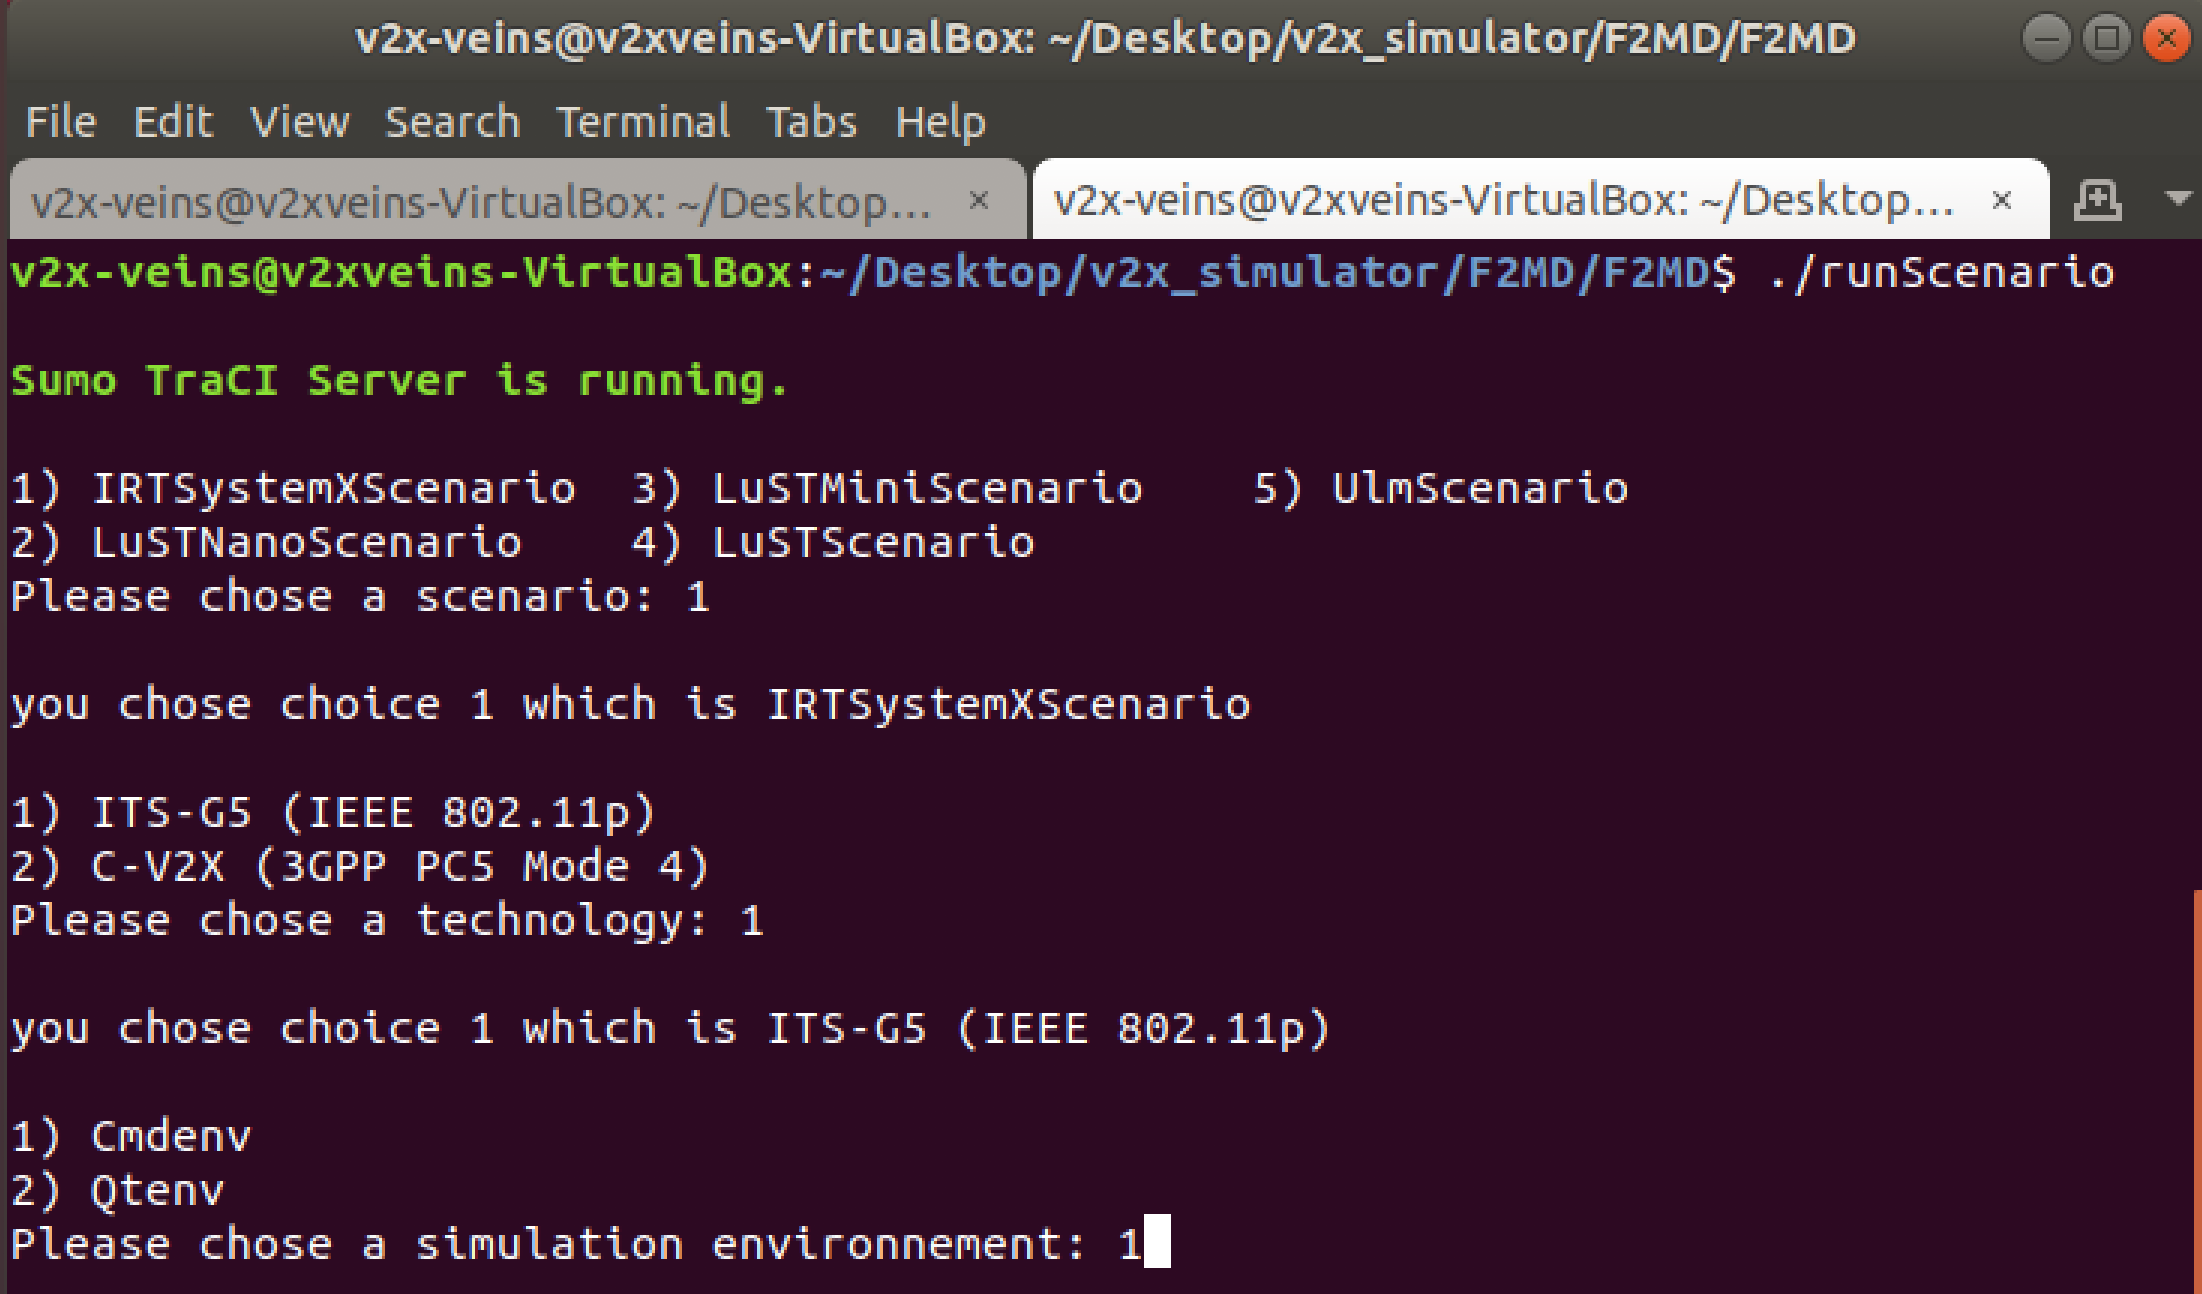
$ ./runScenario
- There are 5 different built-in V2X simulation scenarios. They represent different maps and traffic environments and are readily available to use. Choose IRTSX for trial (1)
- For communication protocol, choose ITS-G5 (1) and for simulation environment, choose Cmdenv (1)
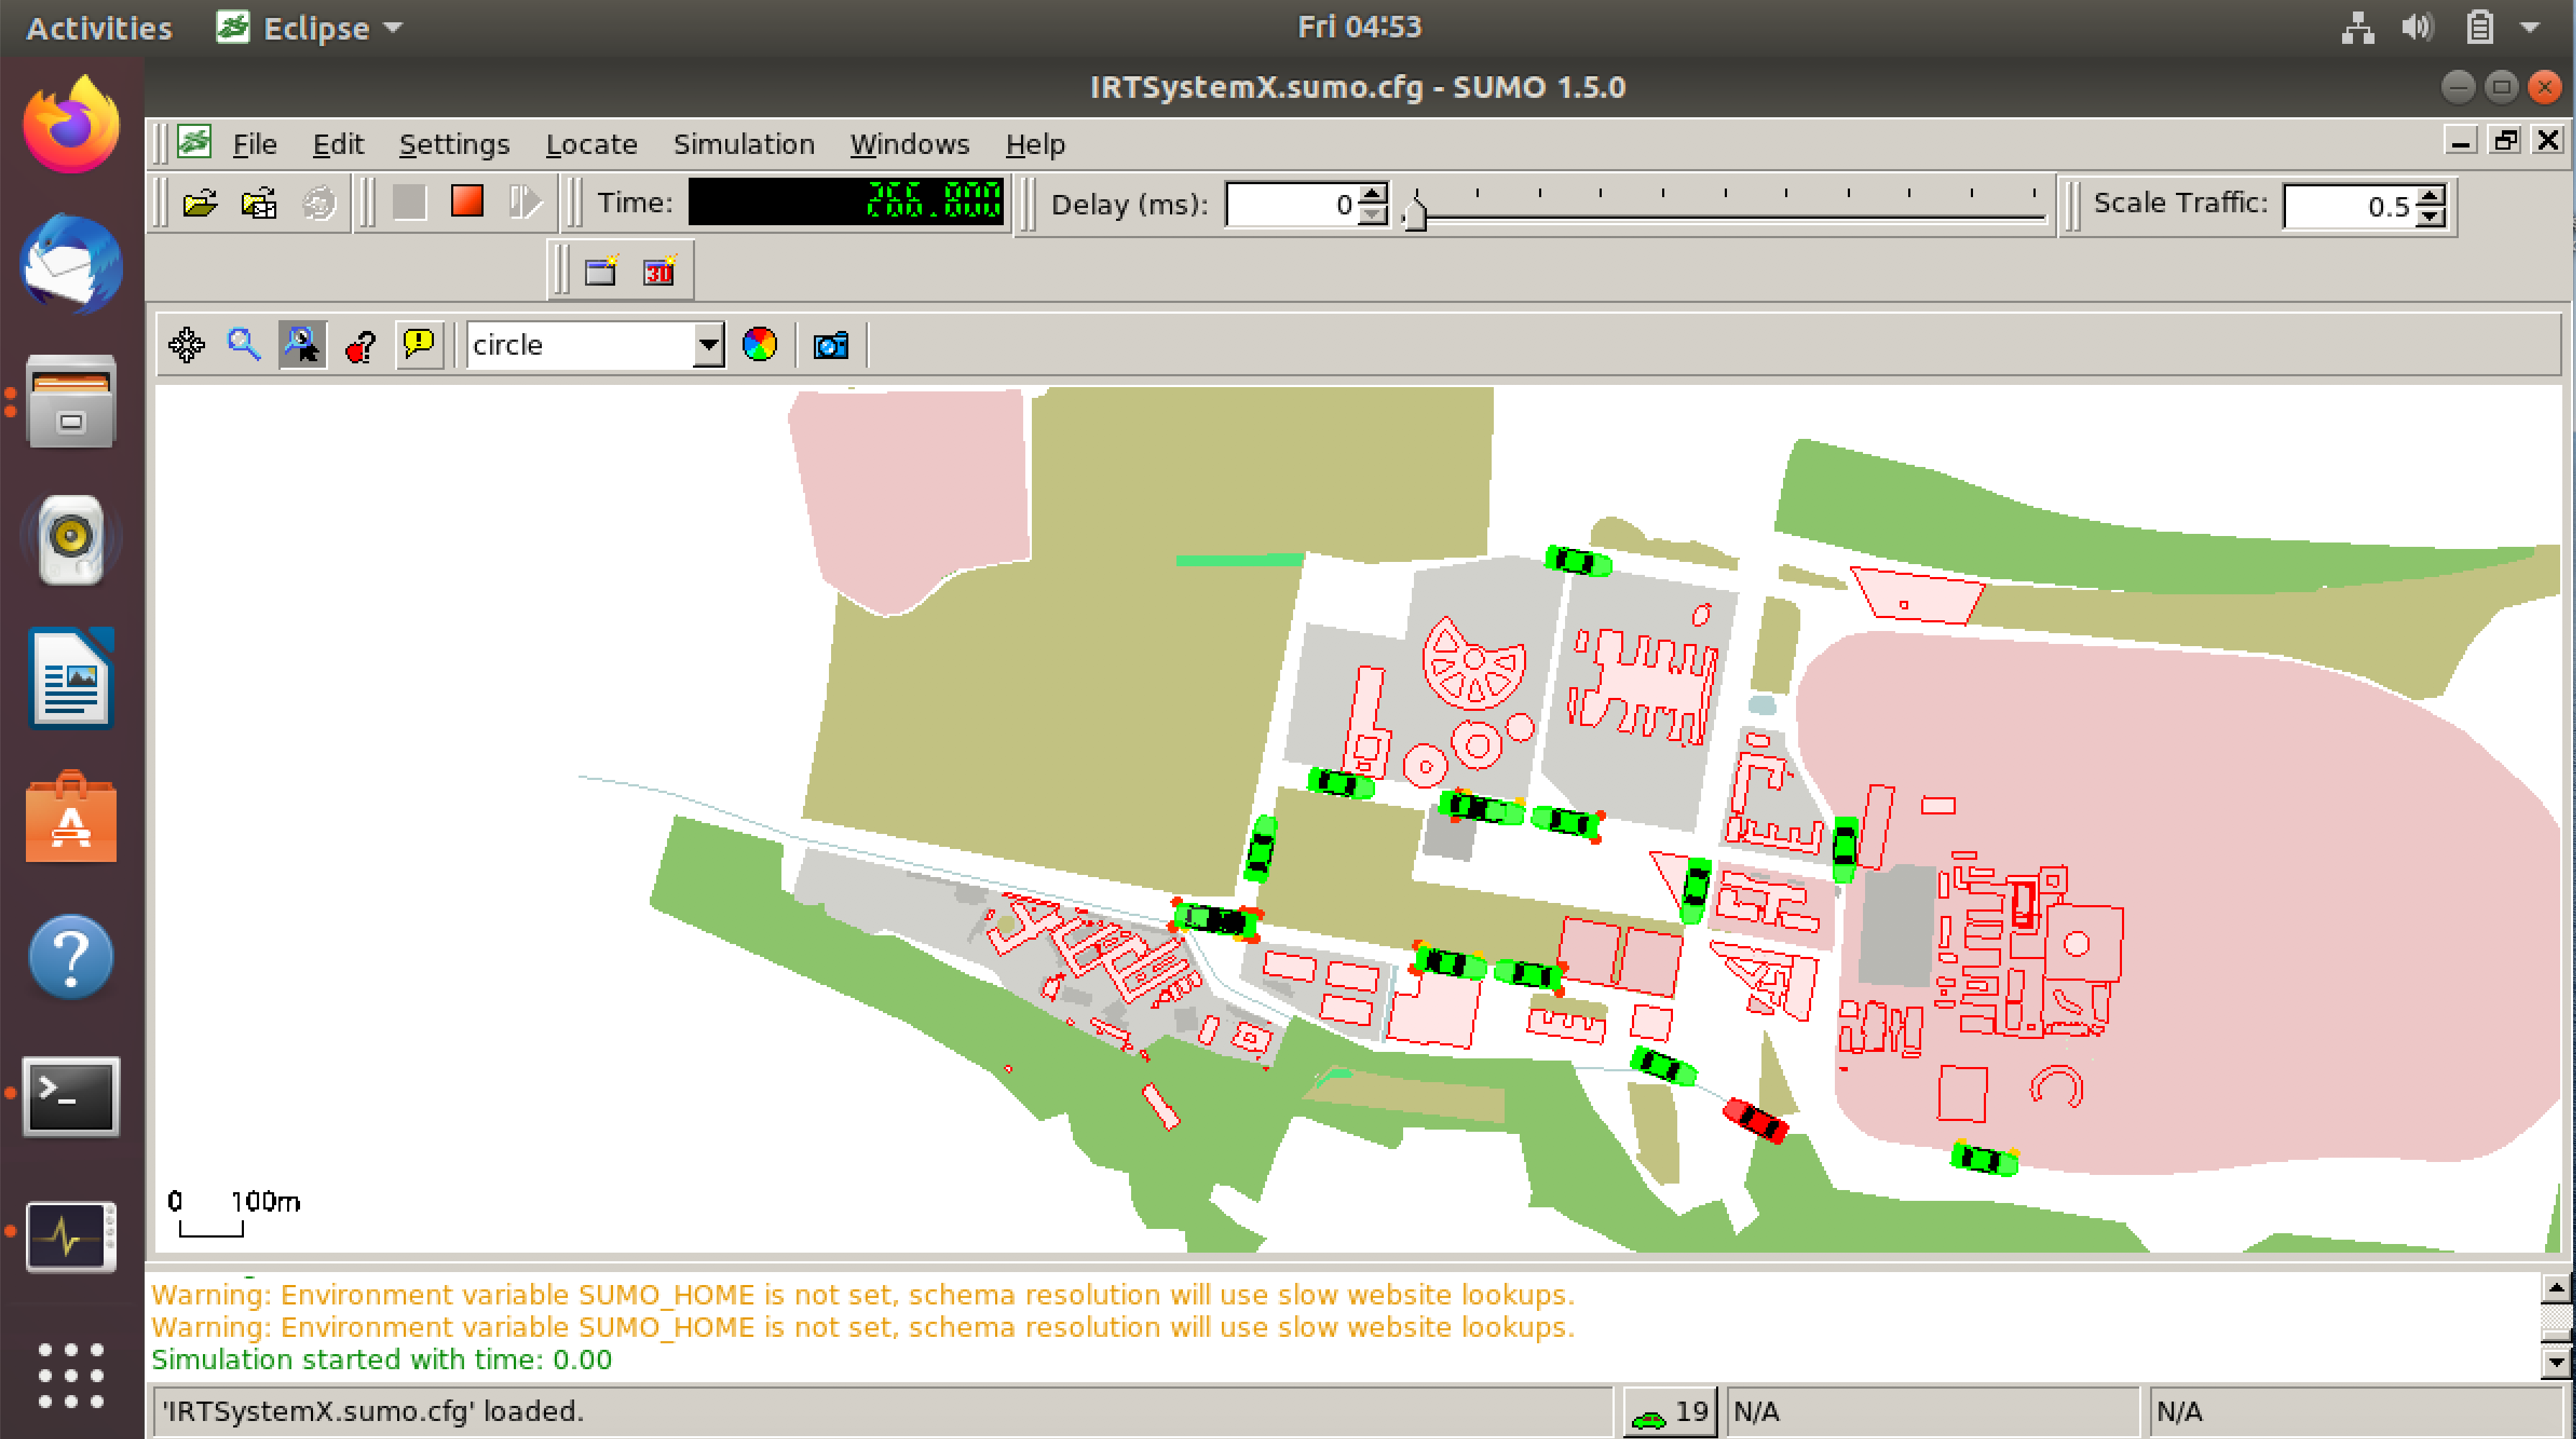
- After a brief loading at the SUMO simulation screen, the simulation will start:
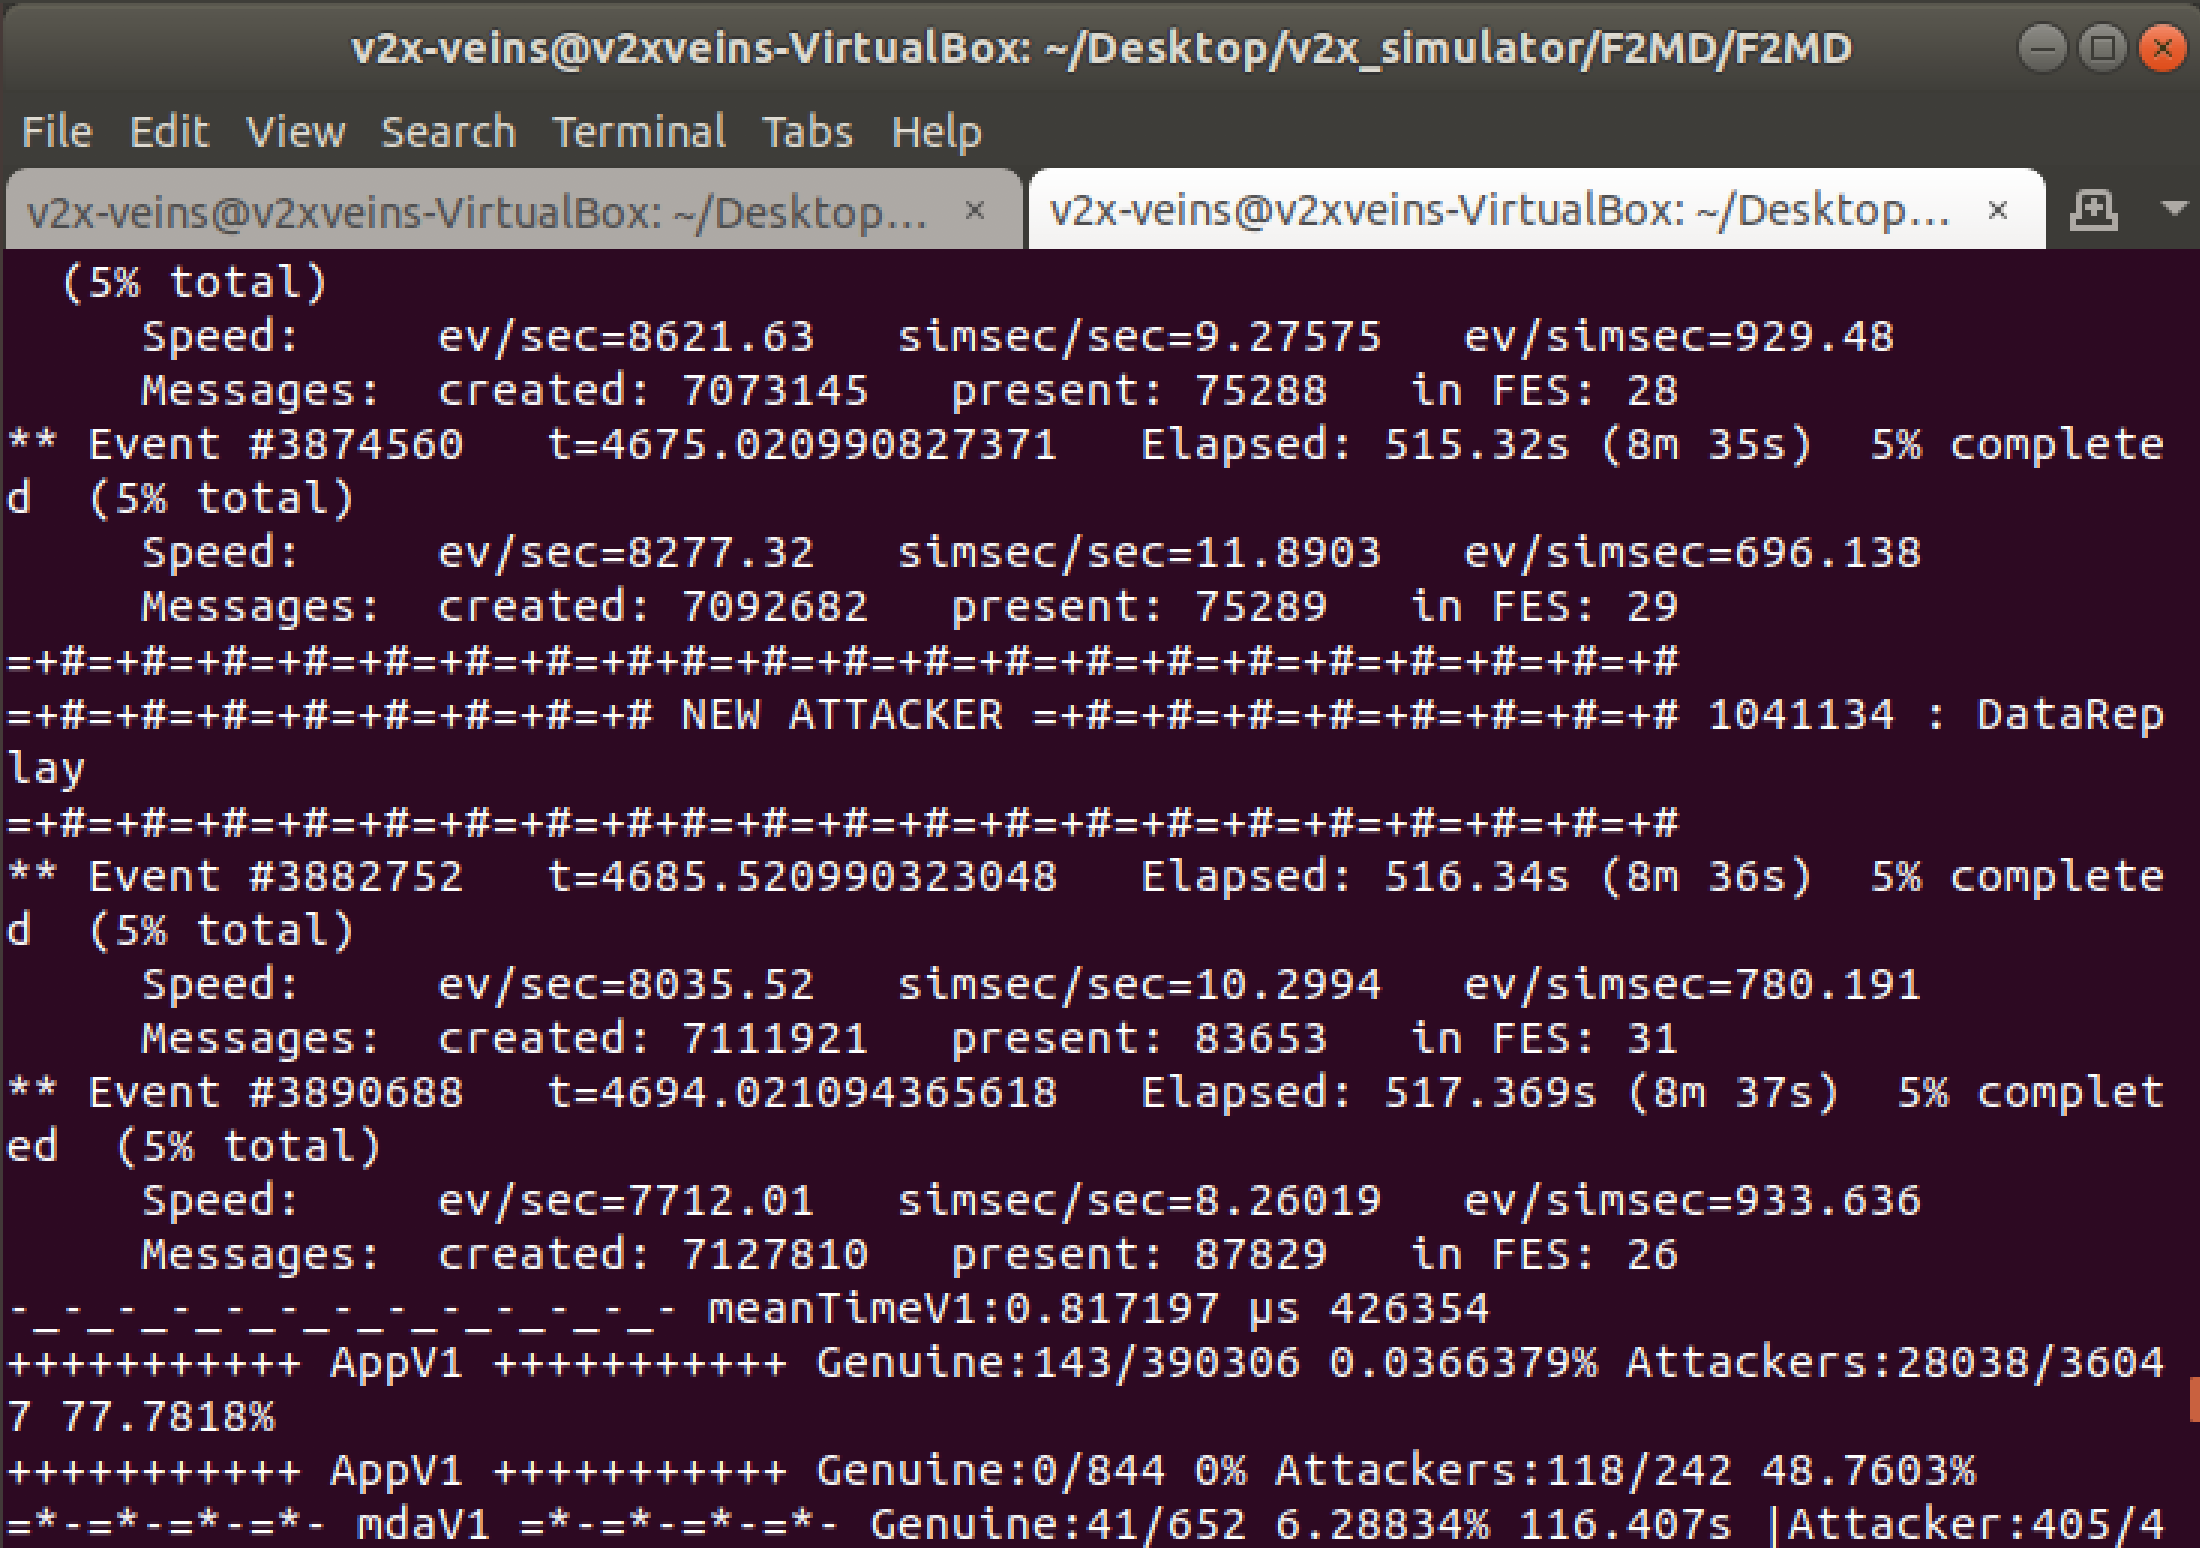
- You can see the attacker vehicles depicted in red, and also see the new attackers in the terminal as follows:
- The simulation data is saved in real-time to
Desktop/v2x_simulator/F2MD/F2MD/f2md-results directory automatically. To visualize the output after simulation, you can run:
$ cd f2md-results && ./plotScenario
You can close the simulation window before it finishes, as it will run for a long time. You dont have to wait for the simulation to finish in order to see the data for the simulation so far.
MP1 instructions
In this MP, we will modify and run a built-in simulation scenario and observe the behavior of genuine and misbehaving vehicles.
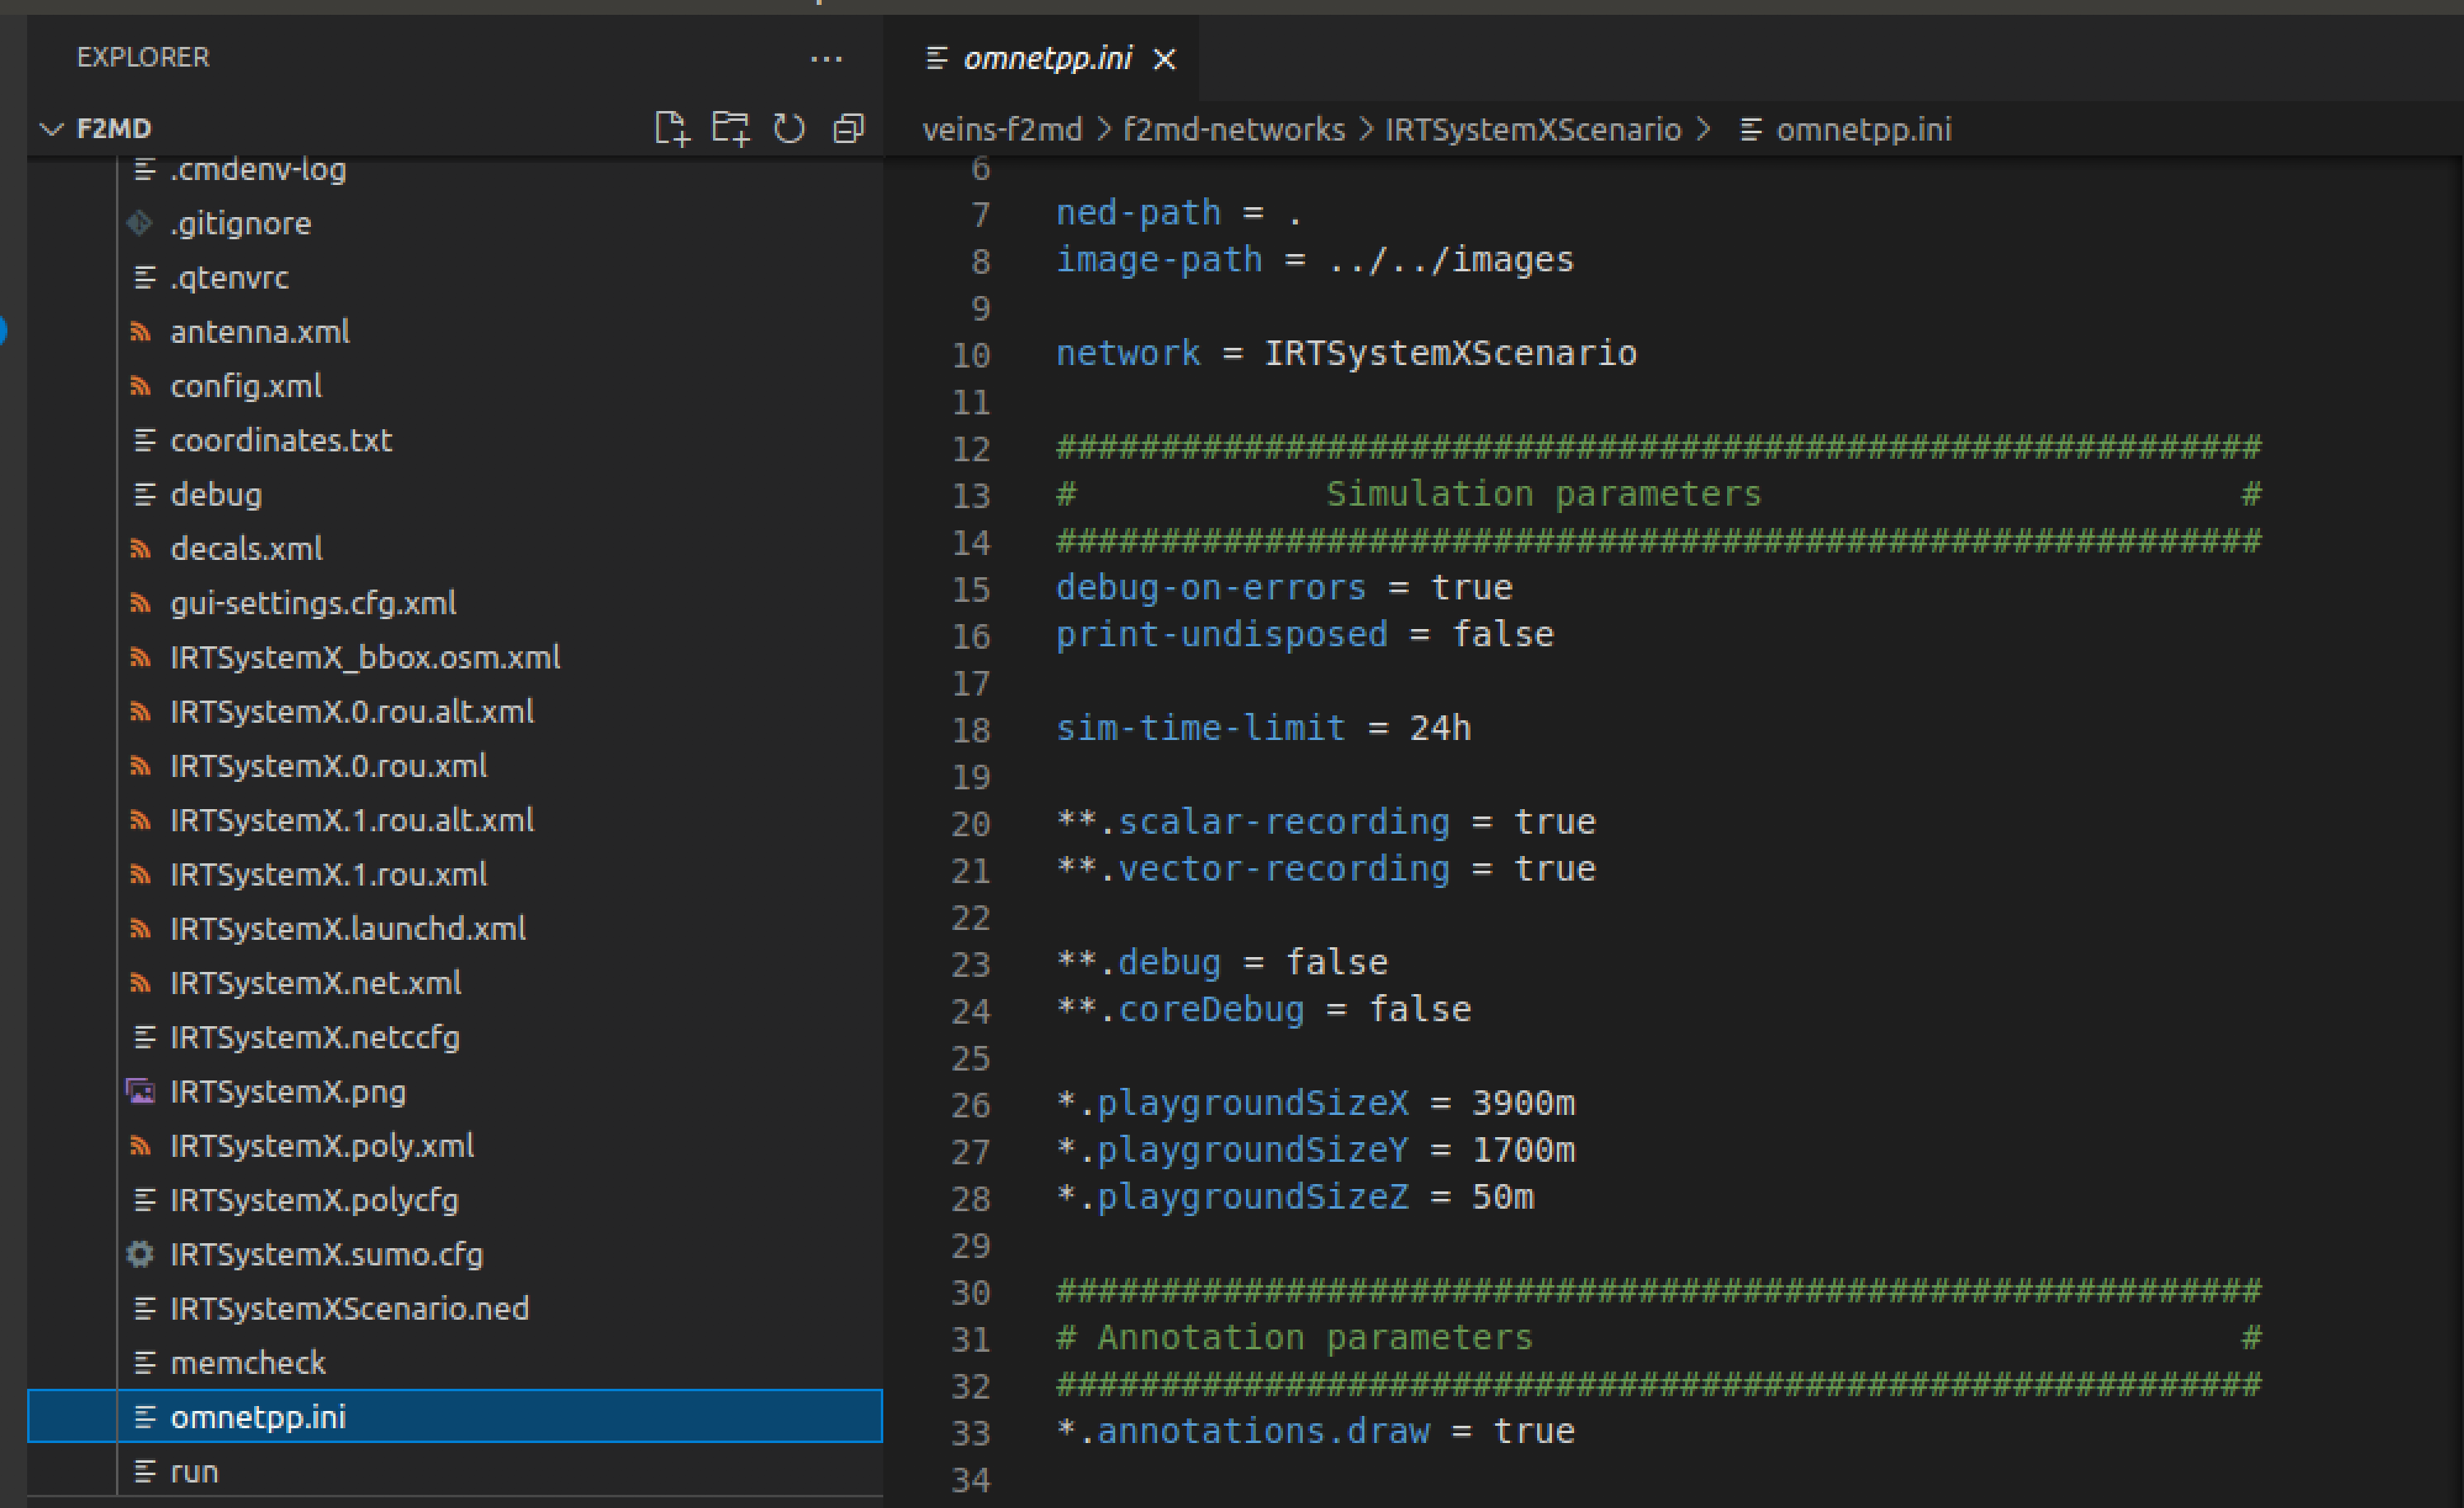
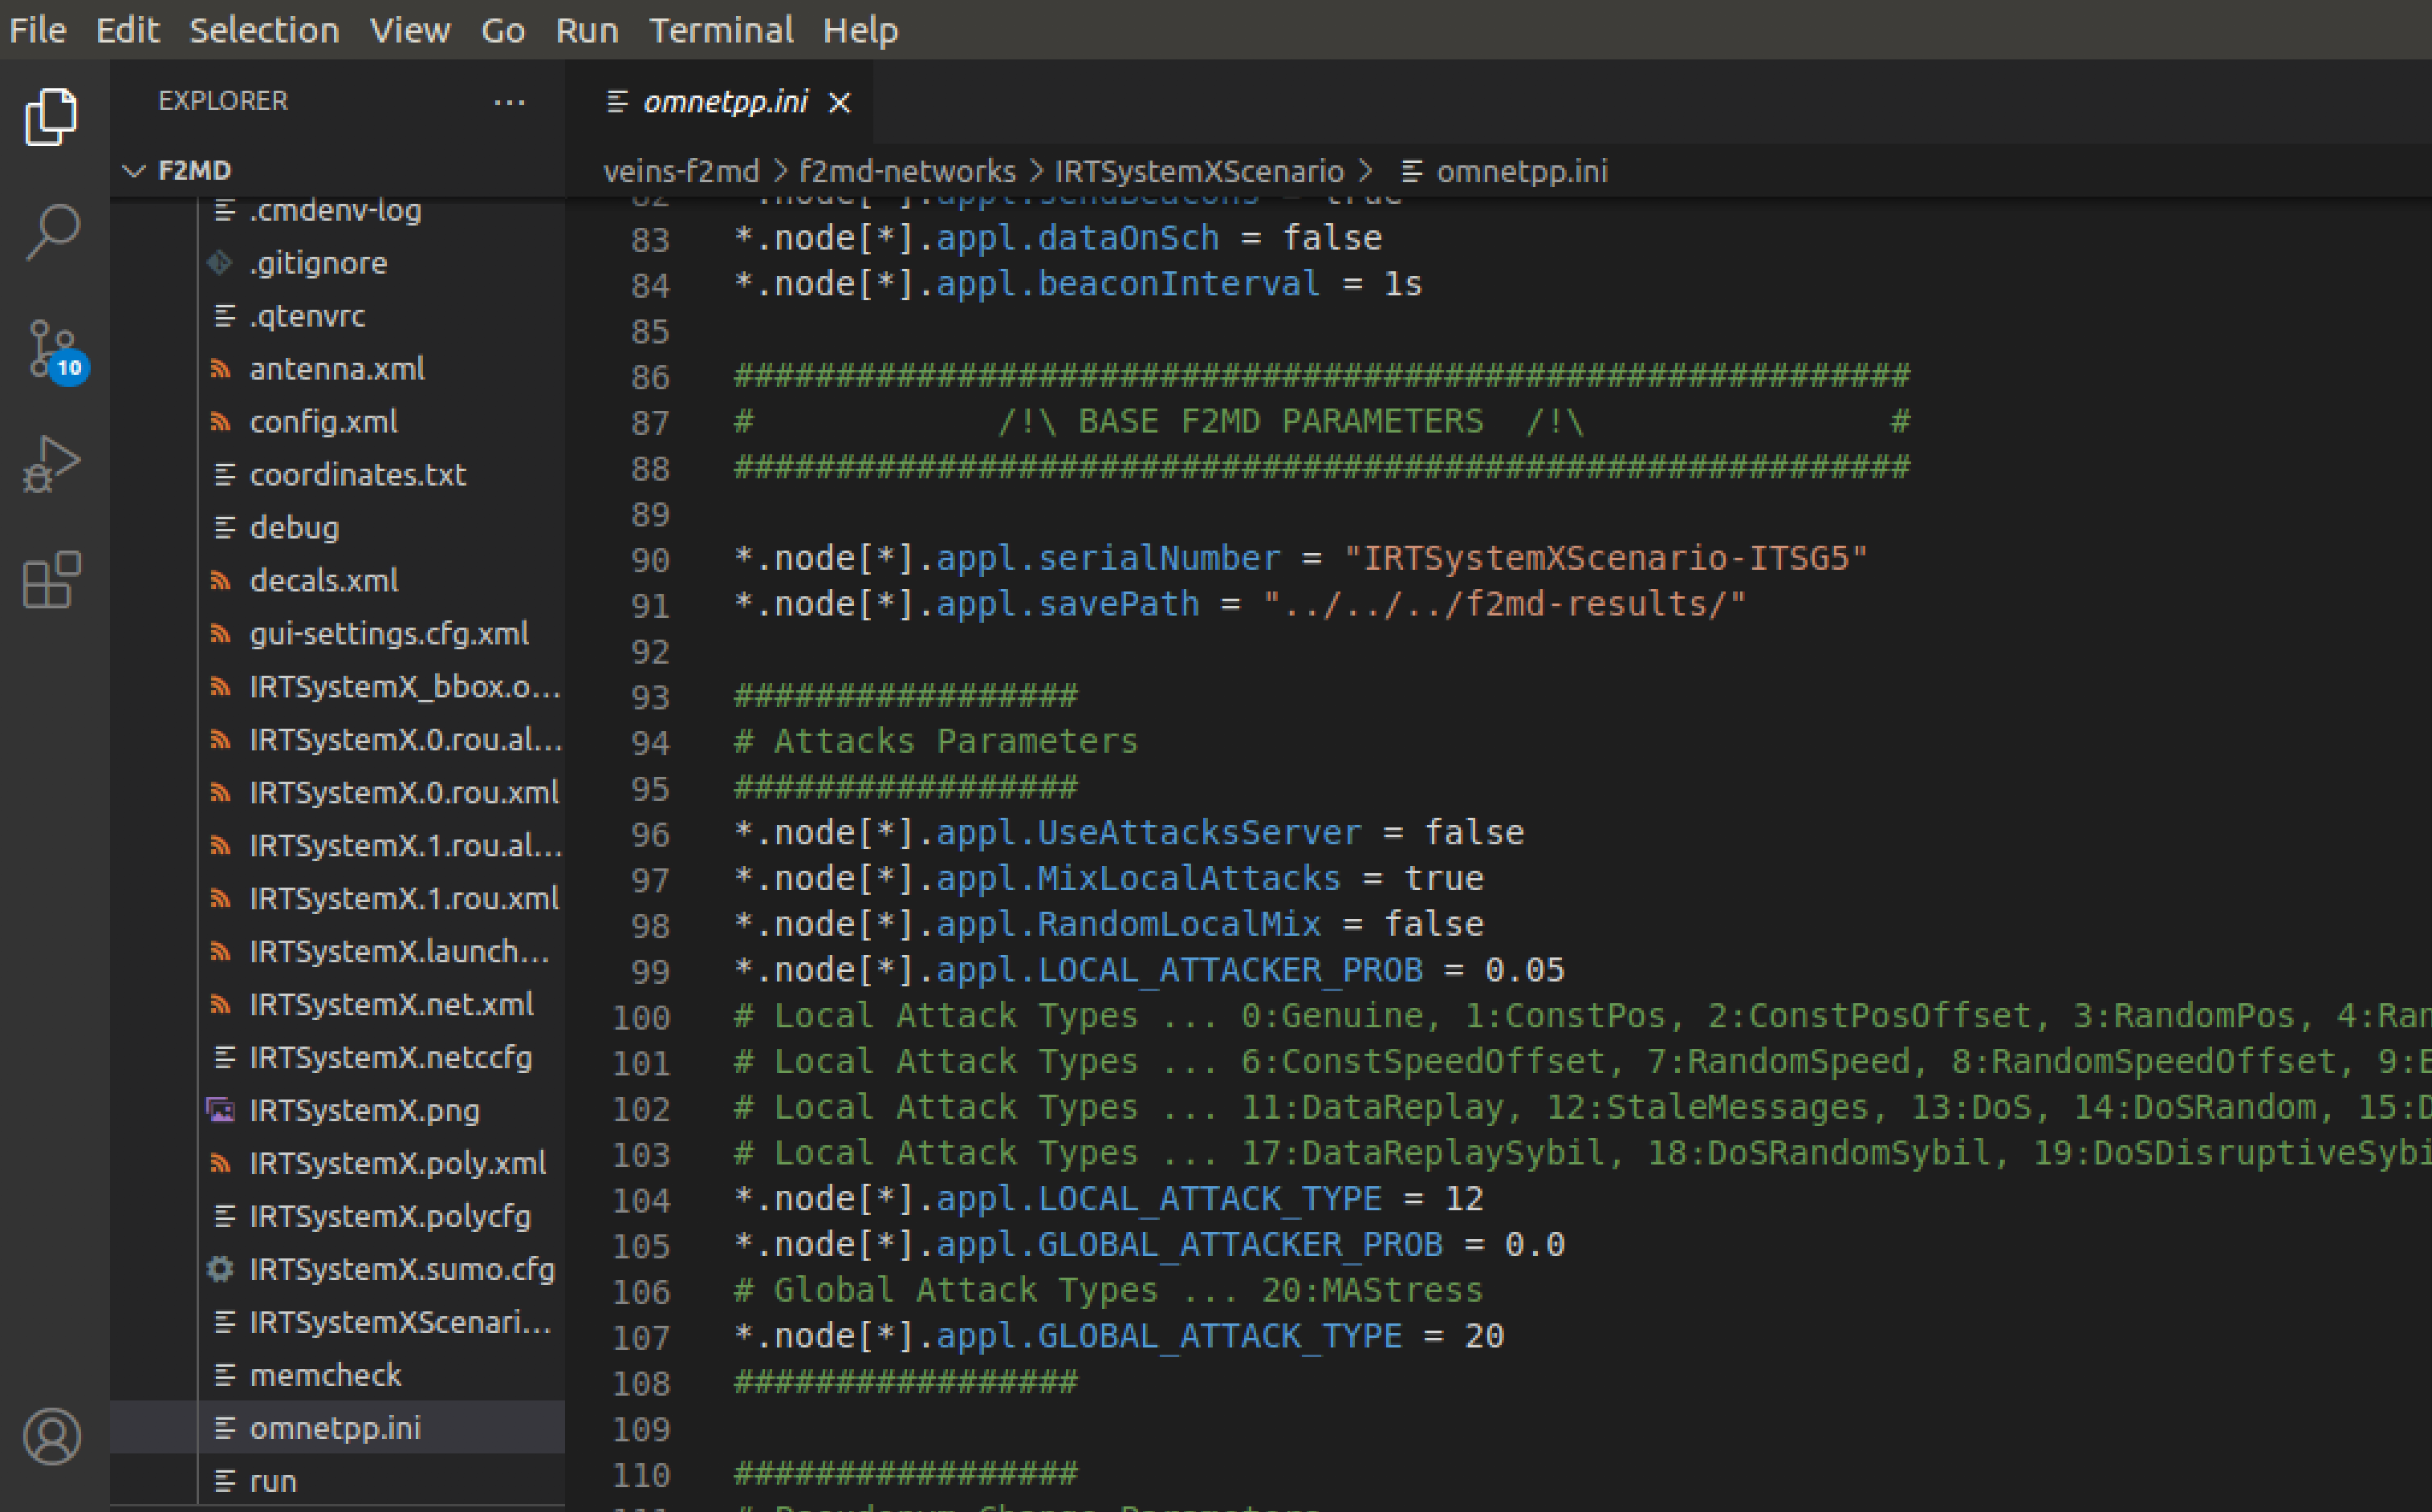
- Every simulation is governed by the
omnetpp.ini files residing in the scenario directories.
We will modify this file to change the parameters of the simulation, such as simulation length and allowed attacker density/types.
-
Go to
Desktop/v2x_simulator/F2MD/F2MD/veins-f2md/f2md-networks/IRTSystemXScenario/omnetpp.ini in your favorite text editor (The VM has VSCode pre-installed).
- Change the simulation length
sim-time-limt to 300s for a 5 minute simulation:
-
Attack parameters and built-in attack types are given in the F2MD parameters section. Change the following parameters:
-
appl.MixLocalAttacks = false to use a specific attack instead of having a mix of all attack types in the list.
-
appl.LOCAL_ATTACKER_PROB = 0.2 to set 20% of all vehicles as attackers.
-
appl.LOCAL_ATTACK_TYPE = 7 to have all attackers use RandomSpeed attack strategy. Vehicles performing this type of misbehavior will broadcast their true position, but random speed messages to other vehicles instead of their real speed, thus try to trick other vehicles about their speed behavior.
- Set
appl.writeVeremi = true to have all vehicles record their received message logs seperately to f2md-results file:
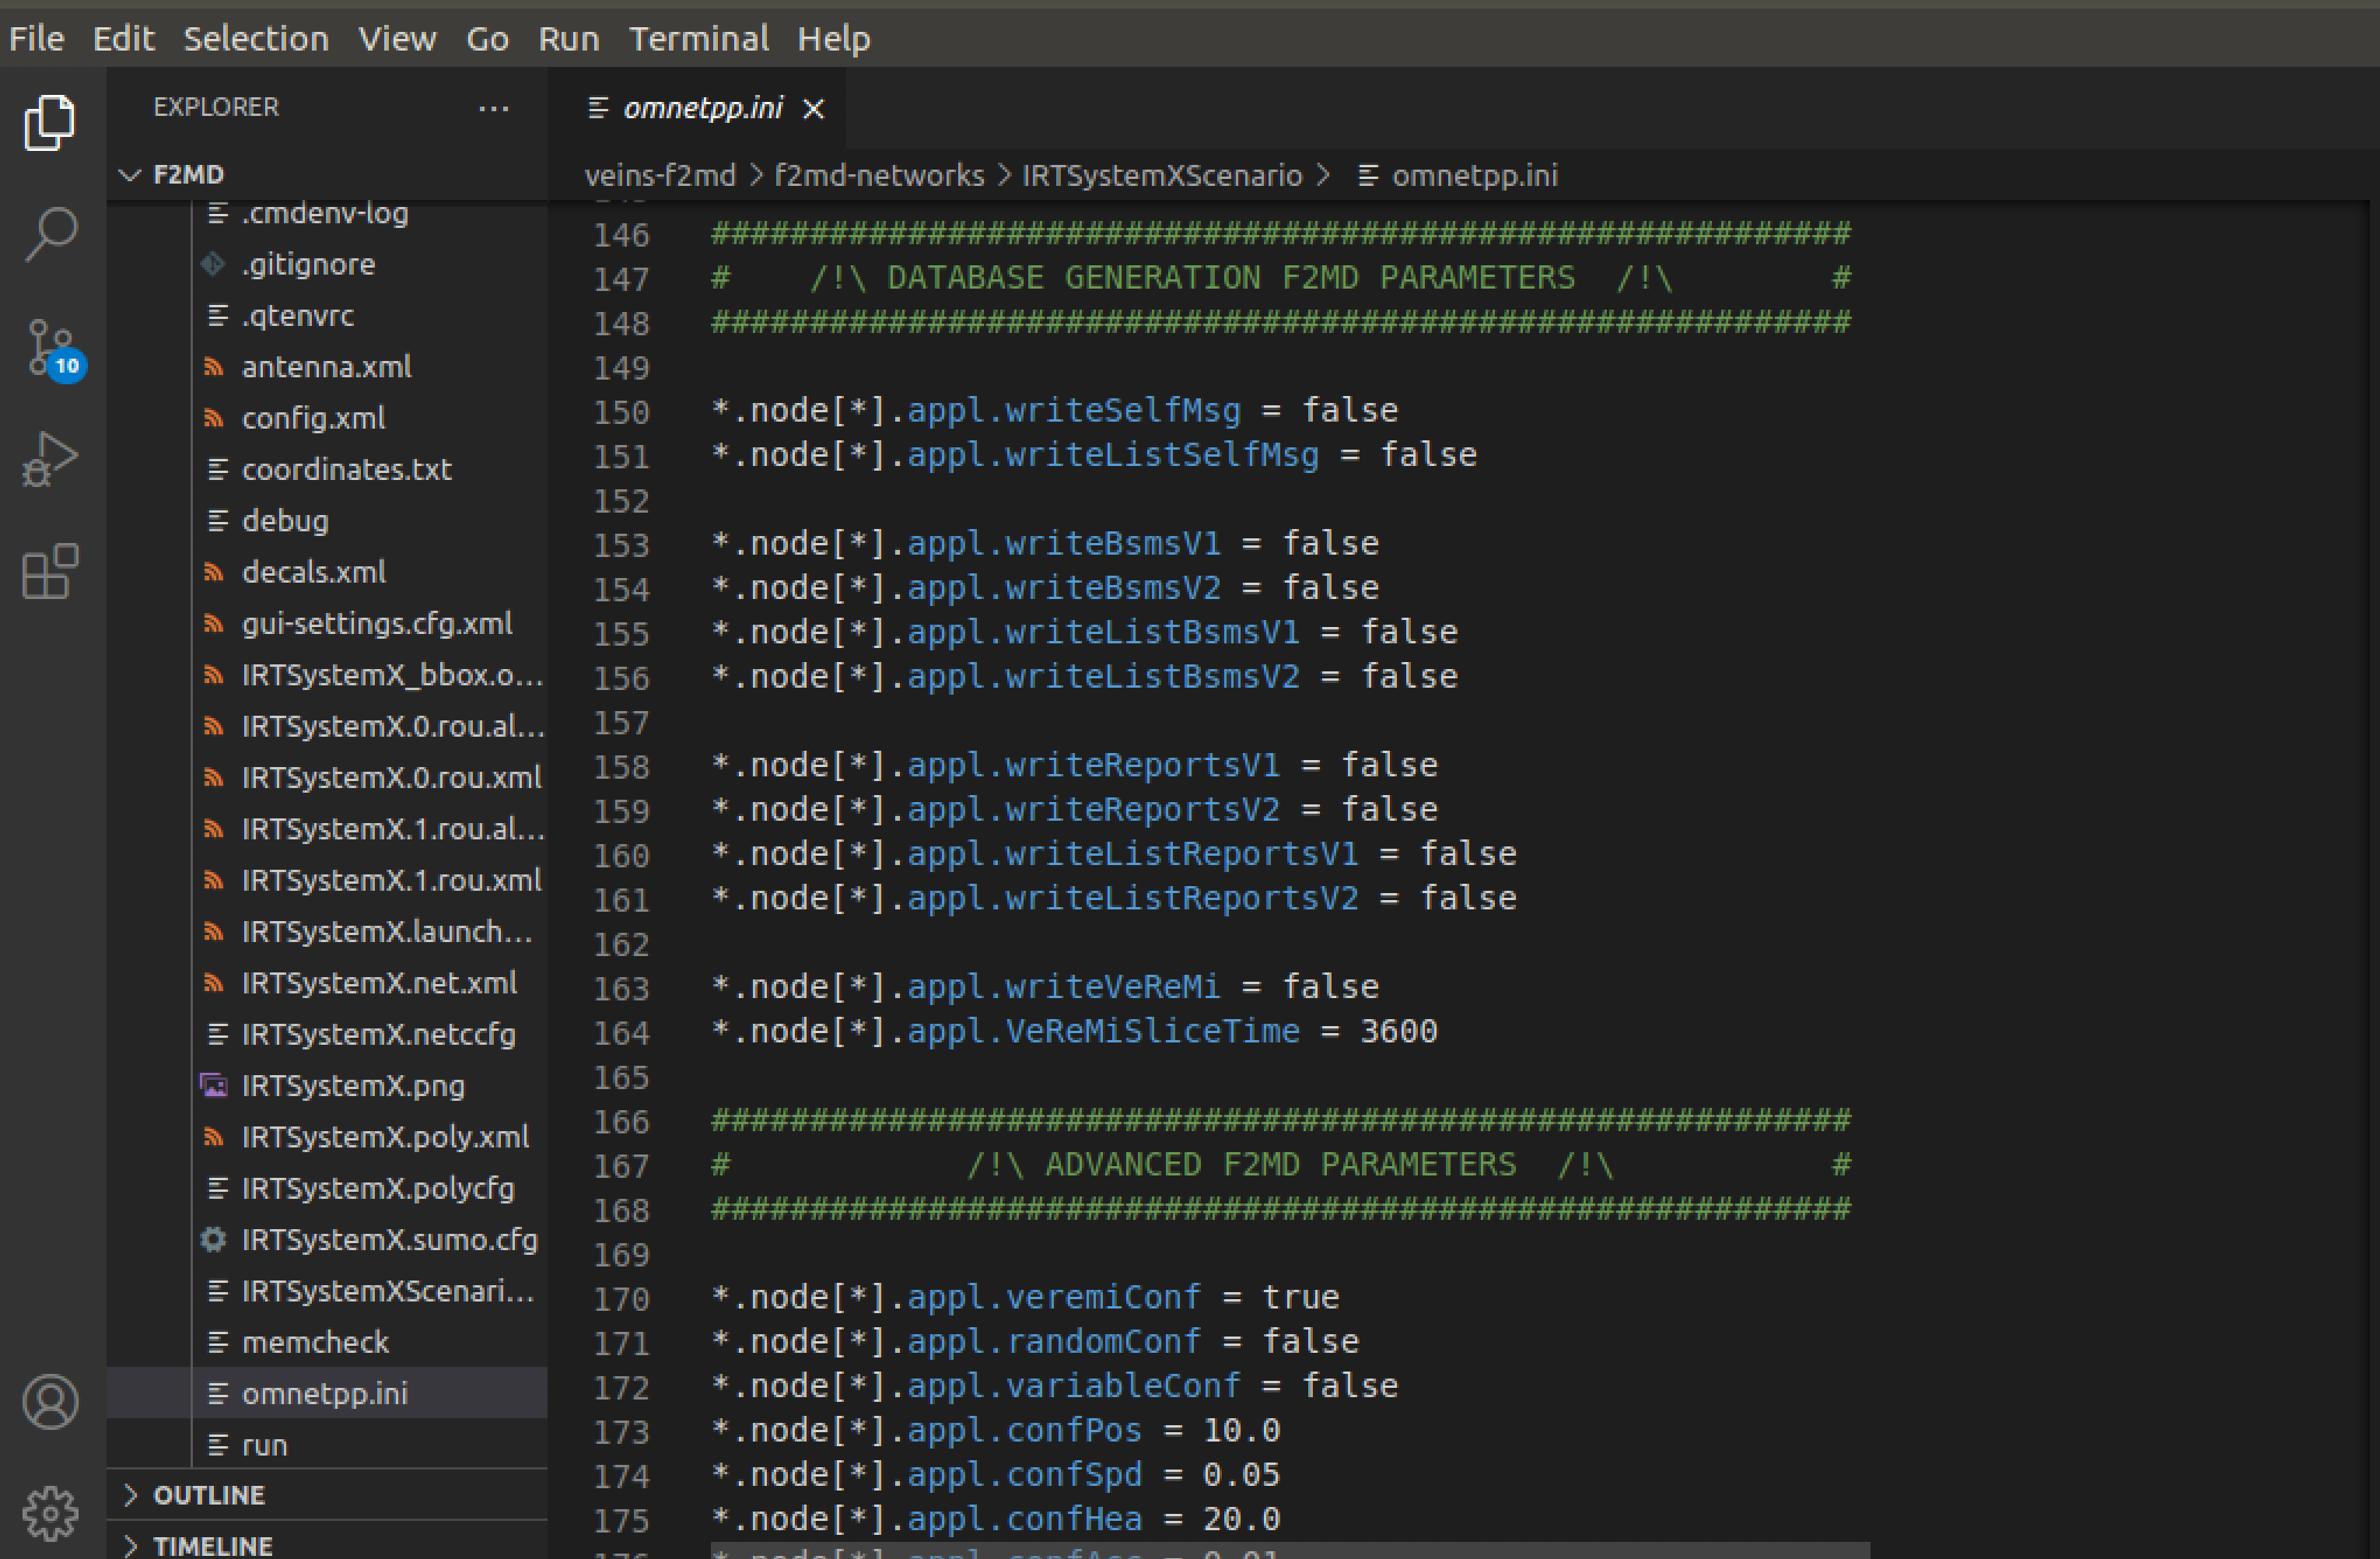
- Check and verify the attack parameters for the Random Speed attack are as follows:
appl.RandomSpeedX = 40
appl.RandomSpeedY = 40
 We will change this parameter to see the changing attack behavior.
-
Save your changes and run the IRTSX simulation again using
./runScenario.
-
Go to
Desktop/v2x_simulator/F2MD/F2MD/f2md-results/IRTSXScenario/Veremi directory to check simulation data:
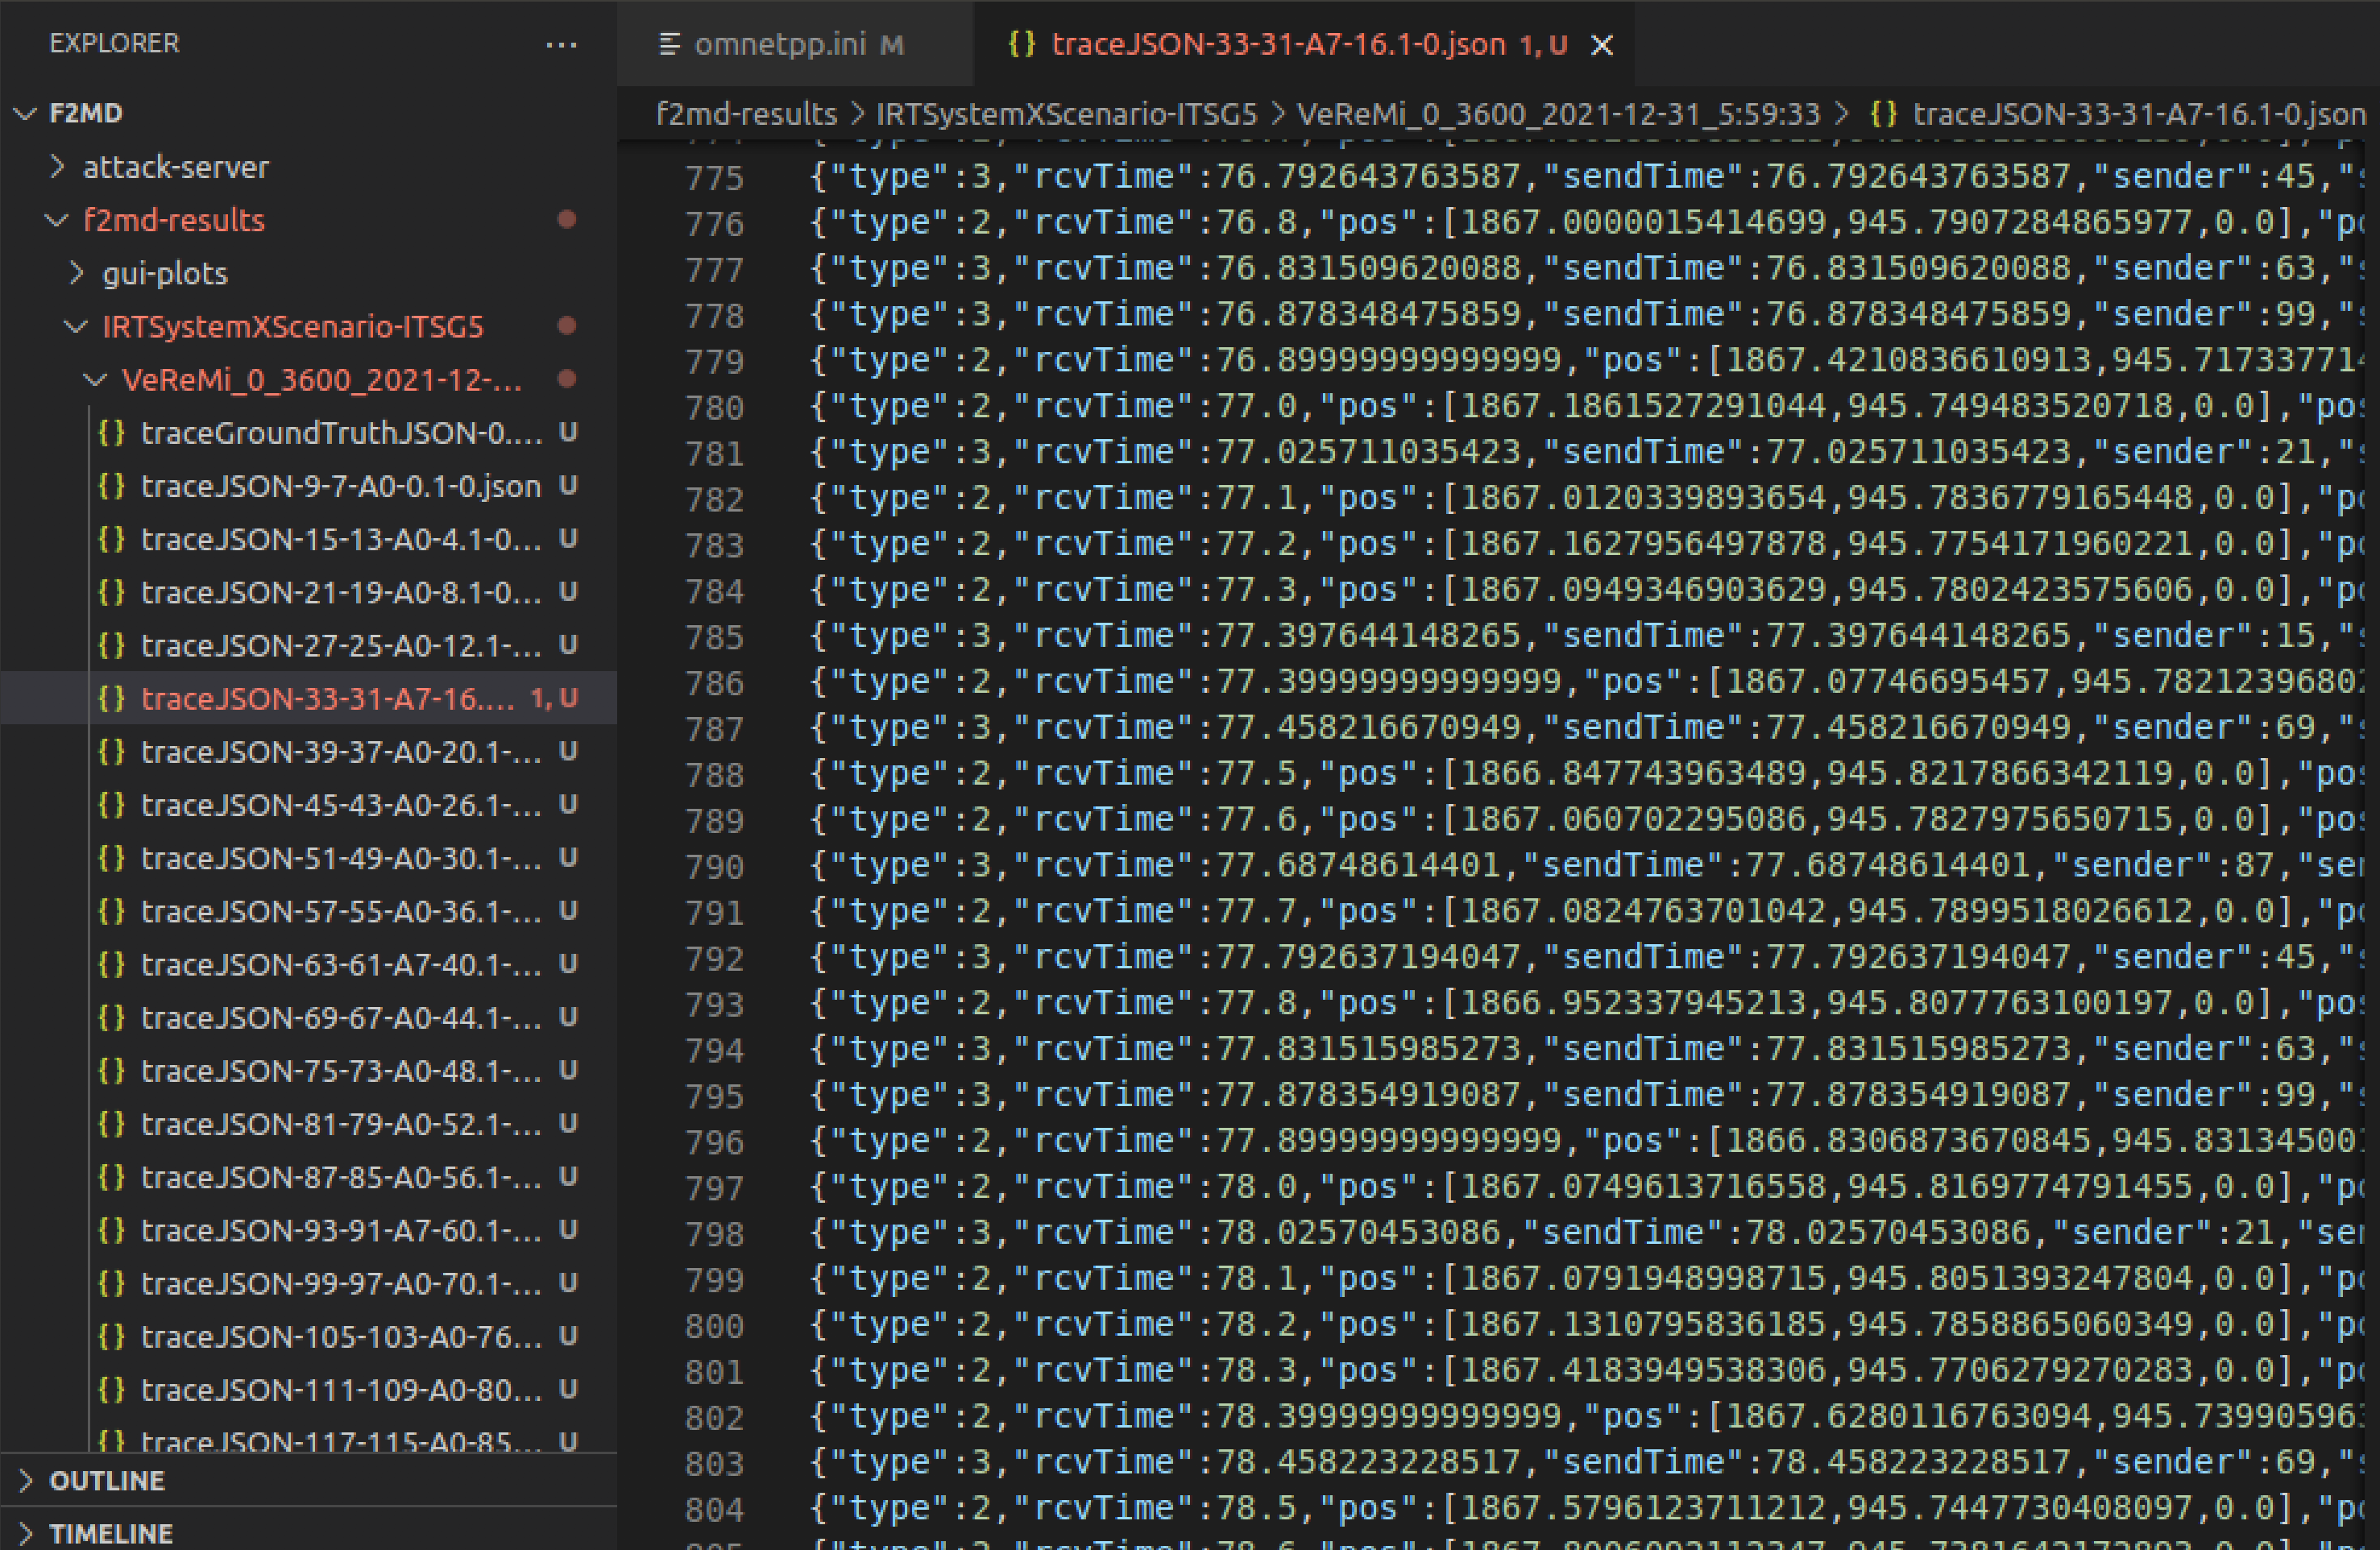
-
traceGroundTruthJSON file includes all the ground truth messages for attacker and genuine vehicles.
-
traceJSON-$vehicleID$-$vehicleID-2$-$A0-7$ files represent the received messages for each vehicle in the simulation. For instance, the name of chosen traceJSON-33-31-A7 represents:
-
$vehicleID$ is the vehicle ID (33).
-
$vehicleID-2$ is the OMNET identifier, also called the pseudonym (31).
-
$A0-7$ is the vehicle's attack type (A7, random speed attacker). A0 represents that the vehicle is genuine (for instance, vehicle ID 27 is genuine). We can see that approximately 20 percent of vehicles are attackers, as we did set.
-
Every traceJSON file has 2 types of messages:
-
type:2 messages represent self-messages containing information from vehicle's own sensors (GPS). In this case, type:2 messages contain the vehicle 33's own position and speed traces.
-
type:3 messages represent the received messages from other vehicles, marked with sender: senderID.
These messages can be genuine or attack.
For instance, message at line 792 represents the message from vehicle 45 to vehicle 33, contatining information about vehicle 45's state (position,speed etc) at time t=77.79 seconds. We know that vehicle 45 is genuine, since the logs show that vehicle 45 is not an attacker (A0): (traceJSON-45-A0).
-
Choose a vehicle log and plot the position and speed traces of one genuine and one attacker vehicle in time. Observe and explain the attack behavior in speed traces for both vehicles. You may use any plot library (matplotlib, etc.) you like.
-
Go back to omnetpp.ini and change the attack parameters for the Random Speed attack as follows:
appl.RandomSpeedX = 120
appl.RandomSpeedY = 120
-
Run the simulation again, choose a vehicle log and plot the position and speed traces of one genuine and one attacker vehicle in time. You may use any plot library (matplotlib, etc.) you like. Observe and explain the attack behavior in speed traces for both vehicles. Comment on the change of attack behavior and magnitude upon increasing the
RandomSpeedX and RandomSpeedY parameters.
Submission Instructions
Save and submit your report as a PDF file of 1 page or less. Your report should include the following:
-
2 plots: State (position, speed, acceleration, and heading) traces of one genuine and one attacker vehicle from the simulation at MP Instructions Part 6, with the parameters from MP Instructions Part 3. [1 pt]
- Brief explanation and comparison of the state traces of genuine and attacker vehicles, especially in the context of speed traces for the current RandomSpeed attack case. [1 pt]
-
2 plots: State (position, speed, acceleration and heading) traces of one genuine and one attacker vehicle from the simulation at MP Instructions Part 8, with attack parameters changed as in MP Instructions Part 7 [1 pt].
- Brief comparison of attacker traces in plots from (1) and (3) and explanation regarding the change in attack behavior after changing the attack parameters. [2 pt]
References
-
https://veins.car2x.org/documentation/
-
https://github.com/josephkamel/F2MD
- Here is another well-put VEINS tutorial for reference:
http://kjit.bme.hu/images/Tovabbi_allomanyok/Trafficlab/Research/SUMOTRACI/SUMO-VEINS_Tutorial.pdf
- A custom simulation tutorial in VEINS:
http://cse.iitkgp.ac.in/~soumya/micro/t2-3.pdf